16 months ago
 3.25 Splitting Steel 2H Axe League Start - Leveling Guide in Notes3.25
Life: 2,84887%
ES: 71
Mana: 134
eHP:
141,982
Resistances: 76%/76%/76%/75%
Evade: 50%
Armour: 28,051
Evasion: 8,878
DPS: 1,238,352
Speed: 4.54
Hit Chance: 100%
Config: Frenzy
Bandit: Kill All
Pantheon: Soul of Solaris, Soul of Ryslatha
Gear


Gems
Splitting Steel
Vicious Projectiles
Returning Projectiles
Momentum
Cruelty
Leap Slam
Faster Attacks
Punishment
Hextouch
Culling Strike
Maim
Purity of Elements
Arctic Armour
Precision
Summon Skitterbots
Berserk
Blood Rage
Sniper's Mark
Mark On Hit
Molten Shell
Cast when Damage Taken
Decoy Totem
Multiple Totems
Temporal Chains
EnemyExplode
Tree Preview
- +500 to Accuracy Rating
- -2 to Accuracy Rating per Level
- Immune to Bleeding if Equipped Helmet has higher Armour than Evasion Rating
- Immune to Poison if Equipped Helmet has higher Evasion Rating than Armour
- Attack Skills Cost Life instead of 20% of Mana Cost
- Enemies Killed by your Hits are destroyed
- Gain 2 Rage on Hit with Axes
- +1% Chance to Block Spell Damage per 5% Chance to Block Attack Damage
- 20% chance to gain Elusive when you Block while Dual Wielding
- Cannot be Stunned if you haven't been Hit Recently
- 10% of Leech is Instant
- Skills Cost Life instead of 15% of Mana Cost
- +30 to maximum Life
- 12% increased Mana Reservation Efficiency of Skills
- 10% more Maximum Physical Attack Damage
- Chance to Suppress Spell Damage is Lucky
- 3% chance to deal Triple Damage
Notes
-::- IMPORTANT LEAGUE STARTING DETAILS -::-

**** THIS BUILD USES 'PRECISE TECHNIQUE', SO ALWAYS MAKE SURE YOUR ACCURACY IS HIGHER THAN YOUR LIFE - (Use low-level Precision, or Rare Jewelry with Accuracy as necessary) ****

**** PLEASE TAKE THE TIME TO READ EVERYTHING BELOW BEFORE POSTING ON THE FORUM THREAD ASKING FOR HELP ****

GUIDE URL: https://www.pathofexile.com/forum/view-thread/3337868


-::- Leveling Notes/Tips -::-

** An Instant Life Recovery Flask is a MUST in this game! Try to get one ASAP!

** Grab a 2H Axe/Sword ASAP! 2H damage will feel much better early on. If you can only start with a 1H weapon, try to grab a Shield until you get a 2H, as it will make you feel much safer early on.

** I recommend starting with Spectral Throw + Chance to Bleed, then switch it to Added Fire or Maim, and add Volley Support . Keep in mind that Spectral Throw does the most damage at its max range, where it spins while starting to return to you, so keep bosses in that area when attacking with it. Try to attack backwards, after passing packs, so that you can kite them for more Bleed dmg, the projectiles last longer and you continue to do damage as you move forward.

** Make sure you grab Decoy Totem to help stay alive and to keep mobs/bosses at max range for Spectral Throw max spin damage.

** Use Dash until you get Leap Slam. You can also use Frostblink right after a Leap Slam.

** At level 12 you can swap to Spectral Helix + Faster Attacks/Momentum + Added Fire or Maim, as it doesn't require as much positioning work as Spectral Throw, but if you prefer, you can stick with Spectral Throw.

** At level 38 you can switch to Splitting Steel + Returning Proj. Supp. + Pierce Supp. + Vicious Projectiles, Mark on Hit + Poacher's/Sniper's Mark, Cast When Damage Taken (level 2) + Molten Shell (level 11) and Hextouch (keep the level at the max your Intelligence allows) + Punishment to your Leap Slam (unless you have Asenath's Gloves); make sure you use Pierce Supp. with Returning Proj., as Piercing is mandatory for it to work properly. You should also already have Berserk by this point.

** If you go with Splitting Steel from the start, I recommend Pierce / Culling Strike while running around, and Vicious Projectiles, Momentum for bossing, then add Cruelty, or you can just run Vicious Projectiles, Momentum or Cruelty all the time. While leveling, don't boss with Pierce (unless you already have Returning Proj.), or with Culling Strike (fine if on Leap Slam) linked to Splitting Steel,

** Under each skill I added additional unchecked gem options where appropriate. I recommend checking the DPS calculation of each, by mousing over their checkbox and seeing which is best; also take the time to read the full gem description, so you understand how it works.

** Use this Checklist link to see from who, for how much, and when to grab your Gems while leveling: https://tinyurl.com/325SSLSgems

** Bandits: Help Alira and then switch to Kill All.

** For your starting gear, be on the look out for 3/4-Linked items with Green and Red sockets, Resistances, and boots with Movement Speed. Copy/Paste this vendor regex search string to find Axes, 3L and MS boots from vendors: g-[gr]-r|r-[gr]-g|g-r-g|r-g-r|nne|rint|s:.+ax

** An Iron Ring early on is very nice for some extra DPS, and along with Medium/Large Mana Flasks will make early bosses much easier.

** A Sapphire Ring for Merveil/Dominus/Daresso, a Topaz Ring for Fidelitas/Peity/Dominus/Shavronne, a Ruby Ring for Gravicious/Kaom/Malachai/Avarius/Kitava, and an Amethyst Ring for Weaver/Maligaro/Ryslatha/Arakaali can also be very helpful; in-short try to keep your Resistances as close to 75% as possible.

** When DPS starts to feel low, buy a new 2H Axe from a vendor and upgrade it with the "+% Increased Physical Damage" recipe. Sell to a vendor: 1 x 2H Axe + 1 x Magic/Rare Rustic Sash + 1 x Blacksmith's Whetstone. (Use unwanted Essences on Rustic Sashes to turn them Rare)

** 2H Axe base progression: Level 2 - Stone Axe > Level 13 - Woodsplitter > Level 18 - Poleaxe > Level 23 - Double Axe > Level 28 - Gilded Axe > Level 33 - Shadow Axe > Level 41 - Timber Axe > Level 45 - Headsman Axe > Level 52 - Noble Axe > Level 60 - Sundering Axe > Level 62 - Ezomyte Axe > Level 66 - Despot Axe. (You can also use 2H Swords, until you start grabbing Axe related Skill Tree nodes)

** 2H Axe unique progression: Level 13 Limbsplit > Level 18 Wideswing > Level 33 Reaper's Pursuit > Level 58 Kaom's Primacy > Level 62 Sinvicta's > Replica Wings. None of the Axes before Sinvicta's are required, but they do make leveling much smoother, so if you can get one, def do.

** Remember to use your crafting bench to improve Resistances and to add more Physical Dmg. mods to your Weapons and Jewelry, and also try to open White Chests along your path, as they contain a lot of Wisdom Scrolls which help a lot early on; just don't go out of your way to open them.

** You shouldn't have to use Purity of Elem. while using leveling Rare gear with Resistances; it's only required once you start mapping and switch to the Unique set of gear, since most of it doesn't provide Resistances.

** You can add Culling Strike to either Splitting Steel itself, or to Leap Slam as a 5L on your 2H axe, and even to the Heralds, but that would increase their Mana Reservation cost.

** As your 5th link, Cruelty is the most DPS, Momentum is also good and Culling Strike for mapping feels very nice (and is easy to switch with Momentum for bossing). Brutality is also an option, but it disables Herald of Ash, which feels pretty good early on.

** If you want to be tankier, make sure you have all Spell Suppression nodes (~60%+ with Lucky Spell Suppression is good), have good Granite / Jade / Amethyst flasks enchanted with Used when Charges Reach Full and an Instant Life Recovery flask (with Overflowing Chalice they should all be up all of the time), fit in Arctic Armour, Skitterbots and try to get a Defiance of Destiny and Progenesis for endgame.

** Keep in mind PoB does not calculate the Ascendancy bonus of gaining 20 seconds of Adrenaline anytime we go below 50% life, regaining 25% Life, and removing all ailments when that happens (we also gain Adrenaline from Death Rush ring, also triggers these last two bonuses). It also does not account for the other Ascendancy bonus of 20% less damage dealt by mobs you have Taunted.

** Once you acquire a Lioneye's Vision, you can drop Life/Mana Leech from the Skill Tree and Pierce Supp. Try to buy 2 x Lioneye's Visions, then 6S both, 4L one to use, while you try to 5L the other. Once you get a 5L, switch to using that one, then try to 6L the other. You can do the same with Sinvicta's and Replica Wings, but it's not required.

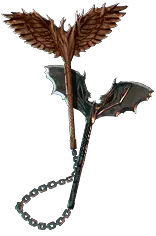
** Replica Wings of Entropy is an incredibly fun weapon, and I highly recommend you buy a well rolled one as soon as you can. You want to get as high AS and Phys Dmg. rolls as you can afford. Once you have one, keep Sinvicta's as your OH Weapon, then swap to it and kill a mob to start your Rampage bonus, then switch back to Replica Wings. I've also added other useful/cheap uniques you can use while leveling.

** With the Chains of Emancipation belt you should be able to sustain Max Rage as long as you are getting hit, and you have charges to decurse yourself with your Life Flask.

** The Call of Steel masteries are only needed if you start using Splitting Steel of Ammunition. You also really only need the +4 Shards one, the other one is optional. Either way, don't grab Call of Steel masteries, if you aren't using Splitting Steel of Ammunition.

** Ascendancy Order: Master of Metal > Fortitude > First to Strike, Last to Fall > Conqueror.

** Keep in mind this is a League Start PoB and is meant to help you get going farming Red Maps, but it's NOT an Endgame PoB. There are many PoB exports showcasing End Game setups/gear/trees from previous Leagues for you to look at.

** This setup was basically my 3.22 Shifting Stones character imported and cleaned up. I have tested this setup well into Red Maps, with every item costing just a few chaos, so you should be able to league start with this very cheaply/safely, then continue to invest in it, or farm for whatever else you want to play.

** Collection of PoE links/tools: https://grinding.zone

** Skill Tree Nodes/Notables/Masteries Allocation Order from level 1 to 90+:

1) Dexterity Nodes
2) Art of the Gladiator
3) Mana Flows
4) Bravery
5) Fury Bolts
6) Spirit Void (10% Instant Leech)
7) Weathered Hunter (500 Accuracy)
8) Precise Technique
9) Freedom of Movement (Cannot be Stunned Recently)
10) Thick Skin (15% Mana Cost as Life)
11) Graceful Assault (Bleed Immunity)
12) Gladiator's Perseverance (20% Mana Cost as Life)
13) Leader of the Pack
14) Revelry (12% Mana Reservation Efficiency)
15) Cloth and Chain
16) Golem's Blood
17) Feller of Foes (Enemies Killed Destroyed)
18) Wrecking Ball (3% Triple Damage)
19) Bastion Breaker (50% chance to ignore Enemy Physical Damage Reduction)
20) Harvester of Foes (Gain 2 Rage on Hit)
21) Lust for Carnage (10% Instant Leech - once you have Lioneye's Vision and you drop Spirit Void wheel)
22) Kinetic Impacts
23) Versatility
24) Heart of the Warrior
25) Diamond Skin (Grab whenever you're low on Resistances)
26) Bloodless (Grab earlier if you feel you need more Life)
27) Soul of Steel (30% Reduced Extra Critical Damage Taken is nice if combined with Belt of the Deceiver and a Corrupted Lioneye's Vision with the same bonus)
28) 2 Point Jewel Slots (Jewels: Resistances/Life/Attack Speed/Physical or Axe Damage. Can also grab these as you find/buy good Jewels)
29) Feline Swiftness (20% to gain Elusive on Block. Requires Replica Wings of Entropy)
30) Wall of Steel (1% Spell Block chance per 5% Attack Block chance. Requires Replica Wings of Entropy)

-::- Regarding Curses/Marks -::-

This build juggles three curses in the following manner:

1) Warlord's Mark: Self-cast this on any mob and then Leap Slam it to gain 10 Rage. You can do this on bosses too, and as long as Leap Slam is the first attack to hit the boss, you will gain the Rage, as Leap Slam guarantees a Stun on mobs on Full Life. A good usage example would be during Brine King's encounter, where a bunch of small crabs rush from the water; they are perfect to cast Warlord's Mark on and then Leap Slam to gain Rage for the Boss fight portions.
2) Punishment: When you Leap Slam mobs, they will be cursed with Punishment, making packs pop much faster, since we also pick up the 10% More Dmg on Low-Life mobs mastery. This will overwrite any Marks that are active, but before it overwrites Warlord's Mark, you will gain Rage (if you happen to Stun the mob afflicted by it).
3) Poacher's/Sniper's Mark: Use either on tanky mobs and bosses for additional single-target DPS.

Once you get Asenath's with Temporal Chains on Hit and +1 Curse, this setup really shines:

* Mobs you Leap Slam will be cursed with Temporal Chains + Punishment.
* One Rare/Boss will be cursed with Temporal Chains + Sniper's Mark on Hit, and if there are additional bosses or mobs in the area, they can be cursed with Temporal Chains + Punishment, if you Leap Slam them.
* Continue to self-cast Warlord's Mark and Leap Slam to gain Rage as necessary.

Early on, you can achieve this double-cursing with a Doedre's Damning Ring or Windscream Boots.