5 weeks ago
 Earthquake Gladiator3.26
Life: 7,155149%
Pool: 7,155
Resistances: 82%/80%/80%/47%
Armour: 25,032
Speed: 2.29
Hit Chance: 100%
Config: None
Bandit: Kill All
Pantheon: Soul of Lunaris, Soul of Ralakesh
Gear
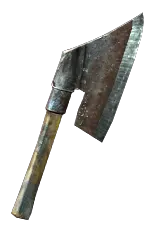
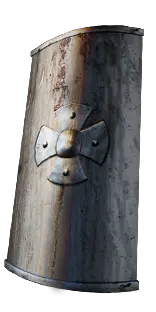

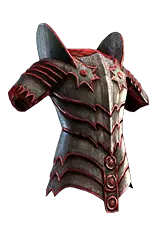
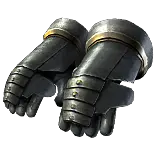



Gems
Earthquake
Brutality
Fist of War
Cruelty
Fortify
Swift Affliction
Vulnerability
Pride
Eternal Blessing
Shield Charge
Faster Attacks
Vitality
Cast when Damage Taken
Molten Shell
More Duration
War Banner
Flame Dash
Blood Rage
Urgent Orders
Enduring Cry
Bladestorm
Maim
Culling Strike
More Duration
Enduring Cry
EnemyExplode
EnemyExplode
Tree Preview
Tattoo of the Kitava Warrior(x3)
5% increased Physical Damage
- +1% to all maximum Elemental Resistances if Equipped Helmet, Body Armour, Gloves, and Boots all have Armour
- You take 30% reduced Extra Damage from Critical Strikes
- 8% increased Evasion Rating per Frenzy Charge
- 8% increased Armour per Endurance Charge
- 30% increased Damage while in Blood Stance
- 15% increased Area of Effect while in Sand Stance
- Bleeding you inflict deals Damage 15% faster
- +3% to Damage over Time Multiplier for Bleeding per Endurance Charge
- +1% Chance to Block Spell Damage per 5% Chance to Block Attack Damage
- 100% increased Charge Duration
- 20% chance to Avoid Elemental Ailments while holding a Shield
Notes
> 3.27 Changes <
- Suppress got nerfed, added a pre-suppress tree and gear setup that's probably just better to use now until you plan to kill uber bosses on Hardcore.

> BLOODLINES <
As of writing this guide(26th of October), only 3 Bloodlines ascendancies have been revealed and none look great for this build.
If a good one gets revealed before leagustart this PoB will get updated to accomodate for it.
There's only one node we can realistically drop for a Bloodlines ascendancy, and that's Jagged Technique, but it is really easy to justify doing so.
If you drop Jagged Technique make sure you get some chance to aggravate with Eater currency on your gloves, and to grab the "20% chance to aggrevate with exerted attacks" bleed mastery.

> FAQ <
> So what Uber Lab is best? <
When doing Pinnacle Bosses: War of Attrition is best. During maps it's a nearly completely dead node though.
How do we aggravate while we have this tree you ask? We have 10% chance to aggravate from the tree and 10% from vulnerability quality.
Since Lacerate hits quite often this should be more than enough.

For mapping we go with Jagged Technique, this is since for clearing we want to hit a target once and have it bleed properly.

In Settlers league I didn't even bother switching out Jagged Technique for Ubers and it was still completely fine, so if you don't want to swap I recommend just sticking with Jagged Technique.

> Why no Determination? <
Determination was nerfed, we already grab a bunch of endurance charges and new base types will give us more base armour.
This combined with the fact that Blood Magic solves all our mana issues and alleviates a bunch of socket pressure(no lifetap required) makes it better to just run Pride and drop all other auras.

> Why Kaom's Sign? <
Kaom's Sign is suprisingly hard to beat, you need a Vermillion Ring with T1 life and Essence of Delirium DoT Mult to even come close. And even that ring still loses you max hits.

> Why no Tincture? <
Since this build relies pretty heavily on being Blood Magic we'd need to pick up Bloodsoaked Blade to fit a Tincture.
This costs extra passive points and means we drain quite some life upon activating the Tincture.
You could also opt to drop Blood Magic and fix mana issues, but that makes the build a lot less beginner friendly and more complex to gear.
In the end just not running a Tincture makes the build a lot easier to get going, but trying to fit one is not a wrong choice, if you want to go for it feel free.
The way to go about this would probably be by dropping Blood Magic and stacking -8 mana cost on both your rings and your amulet.

> PLAYSTYLE <
We mostly just shield charge and flame dash around and use EQ and monsters will explode.
On single target you want to cast Vulnerability and use a Bladestorm for maim. You also want to put down your War Banner(this is instant cast, really not as bad as it might seem).

In bosses with their own loadscreen you'll want to use Enduring Cry to keep up Endurance Charges.

> LEVELING <
Our first goal is getting to level 12, this is probably the most painful part of leveling, we use Spectral Throw for it.

From level 12 to maps we'll use 2H axes with Sunder, which we'll slowly transition into bleed. Lacerate feels really bad while leveling so is not recommended.

See the "Level 13 Example" in the Items section for an example of how you can gear early on.

> AXE CRAFTING <
Video: https://www.youtube.com/watch?v=6ueZc1iRS7Y (the video is for 2h axes, but it works the same for Reaver Axes)

For getting a near-perfect axe, you can do the following:
This method requires you to have a bunch of alterations(probably a couple of thousand!) and ~10 ilvl 83+ Reaver Axe bases:
1. Alteration roll 2 Reaver Axe bases with one of these mods each: T1 flat phys(Flaring), T3+ Hybrid %phys and T2+ % Phys
2. Recombine 2 different mods, this has a 33% chance to succeed. Let's assume you have T1 flat phys and T3 Hybrid
3. Repeat step 2, but get a base with the missing mod. Let's assume T1 flat phys and T2 % phys. You should now have 2 rares axes: one with T1 flat and T3 hybrid being the only prefixes, and one with T2% and T1 flat.
    - Exact mods can be different, as long as all 3 mods you want exist on both items combined and each item has only 2 prefixes
4. Combine the 2 rare axes and hope you hit all 3 prefixes, if not: the resulting base might be useable for this step again and you might only need to make 1 other rare with 2 prefixes to try again
5. Craft: Prefixes Cannot Be Changed -> Scour -> Multimod attack speed & phys dot mult

Early/mid game you spam Essence of Contempt until you hit decent % phys, craft attack speed and you're done.