20 months ago
 Level 75 Crit Volcanic Fissure of Snaking Juggernaut3.23
Life: 3,794106%
ES: 28
Mana: 73
Str: 1,695
eHP:
185,166
Resistances: 76%/75%/75%/75%
Block: 63%
Armour: 37,132
DPS: 11,769,818
Speed: 5.09
Hit Chance: 100%
Crit Chance: 77.58%
Crit Multi: 437%
Config: Frenzy, Power, 15x Wither
Bandit: Kill All
Pantheon: Soul of Lunaris, Soul of Tukohama
Gear
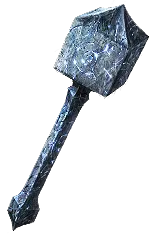
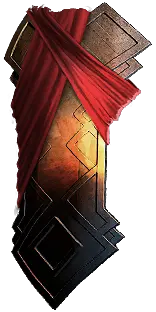
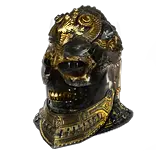
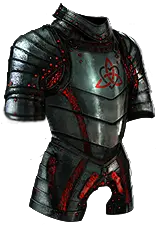


Gems
Battlemage's Cry
Increased Duration
Precision
Arrogance
Volcanic Fissure of Snaking
Increased Critical Damage
Void Manipulation
Volatility
Pulverise
Multistrike
Ancestral Warchief
Ancestral Protector
Multiple Totems
Molten Shell
Cast when Damage Taken
Berserk
Leap Slam
Despair
Faster Attacks
Blood Rage
Determination
Purity of Elements
Assassin's Mark
Faster Attacks
Tree Preview
- 5% increased Attributes
- 15% increased maximum Life if there are no Life Modifiers on Equipped Body Armour
- Recover 15% of Life when you use a Warcry
Notes
-----	-----	-----	-----	-----	-----	-----	-----	-----	-----	-----	-----
VOLCANIC FISSURE OF SNAKING / STRENGTH STACKING JUGGERNAUT
-----	-----	-----	-----	-----	-----	-----	-----	-----	-----	-----	-----
										FULL BUILD GUIDE
-----	-----	-----	-----	-----	-----	-----	-----	-----	-----	-----	-----


INTRODUCTION:
I originally uploaded a few videos about this build to give it a basic showcase, but interest and questions have been larger than I expected, so I figured it would make sense to go deeper into things.
Note that I wasn't the person who "figured this build out" and am not claiming credit as such, I'm merely writing a build guide on the character I ended up with because I am passionate about this character.
It's an amalgamation of multiple characters I compared on poe.ninja that inspired me and bit of my own tinkering.

To make life easier for myself, from this point on I will be referring to Volcanic Fissure of Snaking as VFoS.

This guide contains multiple pre-sets of progression and investment - use the Tree, Skills and Items tabs to switch between them.
This Notes section is very important to ready through before starting to invest. Make sure you understand what you're getting into.
The Core Items section is vital for understanding what the most important items do and what modifiers you want to look for on non-unique gear.
Configuration is set to maximum realistic potential. Remove checks in the configuration (bossing DPS/eHP for example) or disable skills (Berserk especially) to see what differences they make.
Hit DPS displays the DPS if every attack would only hit target with 1 explosion.

Finally, if you are a newer player, get ready to learn.


VFoS MECHANICS:
The initial attack will create a fissure (line) starting at the player's location that will go to where the cursor is, or as far as a single fissure can travel towards where the cursor is, or an enemy if they are nearby, and cause an explosion with a circular AoE.
The fissures seem to do a small amount of damage, the explosions are the main source of damage.
At it's default state, VFoS creates three fissures/explosions.
By applying 20% quality to the Skill Gem, you will get a fourth fissure and explosion. Leveling the Skill Gem does not increase this number.

After attacking, the fissures function similarly to Summon Raging Spirits in the sense that the fissures will self-target enemies to attack, meaning you will be dealing damage for a few seconds after you stop attacking and have guaranteed damage uptime.
This also allows you to pre-attack a boss before it becomes targetable to achieve a pre-ramp that will practically grant you double damage for a few seconds.

The skill will always go towards any enemy within a single travelling distance of a fissure. If there are no enemies within range, it seems to go into a random direction.
It will only target a single enemy once, and attacking far enough away from the boss seems to be difficult. Achieving a double hit on the same enemy this way is either not possible or needs a larger amount of AoE scaling.
This comes down to targeting mechanics of PoE and I don't know enough about it to make any claims.


STRENGTH STACKING AND SCALING:
We will use multiple stats to scale.
Understanding this is required to know why you will need certain stats.

Jewels like Split Personality add a large amount of flat strength, as does our jewellery.
Replica Alberon's Warpath is the vast majority of our damage supply, if not all of it. It adds flat damage based on the amount of strength we have.
Our helmet grants accuracy and critical strike chance based on strength, a massive multiplier to our damage output.
Iron Fortress grants block chance per amount of strenght, but more importantly, also increases melee damage per strength amount. This in combination with the Iron Will keystone on the passive tree allows us to massively multiply our damage with Battlemage's Cry.
Those are just a few, but the idea I'm trying to get through is that every item should have a purpose.

The stats and modifiers that are best for our build are those that either increase our strength directly (flat or %increased), those that scale based on our strength (gain "x" per strength), and those that scale stats that we gained by scaling off of strength.
This all multiplies into huge increases of damage. Upgrades are often meaningful and have a large range of potential.


LEVELS OF PROGRESSION AND INVESTMENT:
Use the dropdown menus inside the Tree, Skills and Items tabs to toggle the layers of progression I have included in this build.
The prices here are based on the Affliction League economy. Take in mind that if you read this in a later league, the prices will very likely be different.
Most important swap you can perform is the weapon. Swap between Replica Frostbreath and a Rare AoE Mace on any item pre-set to see some big differences.
There is no league-start version as I could never recommend someone to start with an attribute stacking build if they aren't ready for that.
There is also no mirror tier version as the people that will want to do that don't need this guide.
This is NOT a cheap build. There are other options if you want to play VFoS that are more affordable that you can start the build out on. In particular, Engineering Eternity's guide that features endurance charge stacking.
After farming some currency, you could build up the gear to then switch over to this build.

All the items in the base set-up have been price checked in Affliction Softcore Trade League. The prices may change over time.

Build options and their respective cost range:
Base Set-Up (Level 75) ~60-100 Divine Orbs (see individual item costs in this pre-set) - EDIT: I have added an additional helmet and 2 more amulets that offer a better base-line investment and more options.
Uber End-Game / Offensive Bias (Level 98) ~250+ Divine Orbs (work towards this base on "core items" and "upgrades & priorities" section below)
Uber End-Game / Defensive Bias (Level 98) ~250+ Divine Orbs (work towards this base on "core items" and "upgrades & priorities" section below) - not as fleshed out as the offensive version, and untested.


-----	-----	-----	-----	-----	-----	-----	-----	-----	-----	-----	-----
								STRENGTHS AND WEAKNESSES
-----	-----	-----	-----	-----	-----	-----	-----	-----	-----	-----	-----

Because it is important to set the right expectations, this section should be read to make sure you understand the strengths and weaknesses.

DOWNSIDES:

- Mediocre life recovery without a flask
Both life regeneration and life leech are needed to stay topped up if you're taking damage. Without blood rage, it's better.
It rolls through maps like nothing and levels up very easily, but in some boss arenas it might take a while to regen. DoT pools are also

- Poor elemental damage mitigation, one-shottable by pinnacle boss slams
Doing an uber boss without speccing more towards defenses means you'll have to play carefully.
Searing Exarch, Uber Shaper and Uber Elder are problematic.
Main improvements could be Versatile Combatant and spell suppression on helmet, tree and charms.

- Is not an easy build to figure out for the first time
Attribute stacking builds require more advanced knowledge about items, mods and game mechanics/terminology.
I'll try to explain as best as I can.

- Poor visual clarity
There will be explosions and textures everywhere on your screen.
After oneshots, DoT pools are your most important concern as you will have trouble seeing them.

- Needs proper investment and leveling to really come alive
The base set-up and a level of around 75-80 is an important baseline, but realize that is what it is: a minimum. This build wants to scale as hard as it can, and that requires investment.
Levels also make drastic improvements to the build, as you need to fill in your cluster jewels to really achieve power. After all, a large portion of points will go into the pathing.


UPSIDES:

- Can deal with almost any type of content in the game
You can be very flexible in what content you want to play.
As stated above, some uber bosses are problematic, but even those become easy the stronger you get.
Delve obviously has a limit, but I haven't tested this yet.

- Can run almost any map mod
I am halfway to level 100 right now by just running alch'd maps with delirium mirrors and well-rolled invitations and bosses in between. There are very few maps I reroll.
There are a few map mods that hurt the build. Most importantly: Cannot Leech, Cannot Regenerate, Reduced Recovery of Life and Mana, -Max Res and Reduced Effect of Auras. One of them is fine, multiple become tricky.
All the other mods can be run without too much problems, besides some unlucky combinations. Damage nerfs only matter for delirium, well juiced wildwood maps and badly modded uber bosses.

- Constant massive damage, regardless of single or multi target
This is one of the most important features that makes the skill stand out against skills that are better at either bossing or mapping.
It spreads across the map killing everything, but can also be used to hit the same enemy more than once with a single attack and just deals a stupid amount of damage.

- Easy to play
You press two buttons to attack: VFoS and Battlemage's Cry. You leap slam to move around.
Sometimes you might press Despair if you feel like you need it, mostly against bosses.
When bossing, also use totems and pre-attack as instructed in VFoS Mechanics above.

- An amazingly fun experience
This is really the most important point of this whole build for me.
I fucking love this skill and the build I wrapped around it.
Everything dies in glorious chaos. Pure power fantasy.


-----	-----	-----	-----	-----	-----	-----	-----	-----	-----	-----	-----
										   	CORE  ITEMS
-----	-----	-----	-----	-----	-----	-----	-----	-----	-----	-----	-----

I will be basing the build upon these core unique items.
- Iron Fortress (Body Armour)
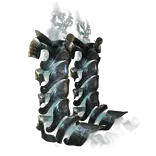
- Replica Alberon's Warpath (Boots)
- Redblade Banner (Shield)
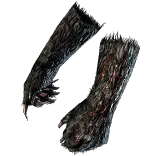
- Oskarm (Gloves) - ideally corrupted with +crit chance to attacks. Despair on hit corruption is also an option if you don't want to cast despair by yourself.

In addition, the pathing on the tree and the 3 Cluster Jewels are core. I've seen a few people try slightly different paths so it is not the one and only way, but it is quite efficient as it is now.
The power of the small nodes on the Cluster Jewels can vary depending on how much you want to invest, but the notables are important.
Strong notable passives are: Overlord, Veteran Defender, Martial Prowess, Fuel the Fight, Feed the Fury, Expansive Might

In terms of weapons, the choice in this guide will be between Replica Frostbreath and a Crafted Mace.
The former is cheap and deals double damage to enemies chilled by your chaos damage and is fairly cheap and easy to purchase, making it ideal to start out with or just stick with if you like it.
The latter can scale further depending on how many wanted modifiers it has. I have included crafting recipes for cheap and medium-investment versions at the bottom of this guide.
Generally, just start with Replica Frostbreath.

Rings, amulet and belt want to have T2 strength and resistances at the very least. If possible, int or dex depending on what you need to upgrade your gems properly, but it's preferred to take the big nodes on the passive tree or get a str/dex or str/int charm.
In addition to flat attributes, the amulet can also roll %increased strength and attributes with the right influenced base, so take this in mind when crafting or buying.
Synthesized jewellery with %increased strength and attributes implicits are later upgrades.
Annoint "Whispers of Doom" on your amulet so you can use both Assassin's Mark from Oskarm, and Despair.

Core jewels besides the Cluster Jewels are:
- Lethal Pride with as much %increased Strength and %increased Maximum Life as you can afford (use Timeless Jewel Calculator to find seed numbers to search for on trade). Life/mana leech is also useful if you have no other sources.
- Balance of Terror with "Inflict Wither for 2 seconds after having cast Despair in the past 10 seconds"
   You could also use Withering Step, but I have chosen not to in this build guide. Huge damage component.
- That Which Was Taken - can be cheap for only 2-3 useable mods.
   Take this as one of your last items so you can fill in whatever you're still missing. Very flexible item.
- 2x Split Personality with +5 Strength and +40 armour.
   Put them in the correct place: the cluster jewel at the end of the pathing.
- Any rare jewels that grant attack speed, strength/attributes, %maximum life, accuracy or critical strike multiplier (crit multi with fire skills and crit multi with one handed weapons have the highest values).
   If the investment for the best jewels is too much, just drop the values a bit or go for other stats that are beneficial for the moment.
   Get corrupted blood immunity on one of the jewels. Resistances if you desperately need them.

I will consider the Forbidden jewels to be non-core items for the base set-up. They are very effective upgrades, though.

Finally, the most important Flasks are, in order:
1a. Life Flask (if you are not immune to corrupted blood, or want more life recovery) with "Bleeding/Corrupted Blood immunity"
1b. Bottled Faith
2-3. Diamond Flask / Basalt Flask
4-5. Silver Flask / Quicksilver Flask / Amethyst Flask / Granite Flask
You want to roll the flasks so they have well rolled increased armour and increased critical strike chance at least.
Other options are attack speed, movement speed, reduced effect of curses on you, and whichever would make sense for you specifically.
You could also roll "bleeding/corrupted blood immunity" if you don't want to use a life flask but don't have immunity on a jewel.

Charms:
In terms of the Affliction league, you will use the Primalist Ascendancy. If you are reading this in a later league, skip this part.
Get any charms that grant %increased Strength or +Strength, as well as any modifiers you couldn't get on That Which Was Taken.
There are plenty of useful modifiers, so there should always be a supply on trade. %Strength and +Strength on the same charm is very expensive.
You can get spell suppress chance if you are okay with replacing %increased strength on one or more charms.


-----	-----	-----	-----	-----	-----	-----	-----	-----	-----	-----	-----
								    UPGRADES AND PRIORITIES
-----	-----	-----	-----	-----	-----	-----	-----	-----	-----	-----	-----

Once you have the base set-up working and you start collecting more currency to get some upgrades, these are strong options:
- Awakened Multistrike
- Forbidden Flame+Flesh with Ngamahu
- Rings with Strength and All Attributes as well as maximum life and -mana cost. Third suffix preferably a resistance if needed or accuracy rating.
- Synthesized belt with max rolled %increased strength implicit and 20% attribute catalyst applied.

Once you've gotten some of those upgrades and want to spend even more, consider:
- The Adorned: Swap place with a Split Personality (or rare jewel if you don't have forbidden jewels), and replace all rare jewels with corrupted magic jewels that are max rolled with strength/crit multi to achieve a significant upgrade. Either get a really well rolled one (140-145%, calculate your own breakpoints) or don't.
- Mageblood: shifts the balance away from increasing strength towards increasing flask effects. A damage drop is expected, but in return the build becomes safer and more consistent.
- Synthesized Rings or Helical Rings: expensive and only worth the investment if their mods are near perfect, but a significant upgrade if you can get them in.

The absolute high-end upgrade apart from mirror tier rare items is:
- Original Sin + Rare Mace with fire damage per strength scaling


-----	-----	-----	-----	-----	-----	-----	-----	-----	-----	-----	-----
										SKILL & SUPPORT GEMS
-----	-----	-----	-----	-----	-----	-----	-----	-----	-----	-----	-----

I won't go into too much detail here except for some important basic knowledge.

- VFoS gem should be at least 20% quality for the additional fissure
- Battlemage's Cry provides A LOT of damage, it is by far the most important utility skill of the build. Use it together with VFoS by double pressing. It literally multiplies our damage about 5-6 times.
- Purity of Elements and Damage with Critical Strikes Support are the first options you want to get to 20% quality
- Berserk can be taken out of the Cast When Damage Taken set-up to use manually if you use left-click to move. I use right click to move and thus lack a final slot in my action bar, that's why I have it linked to CWDT. If this doesn't make sense, don't worry about it.
- Despair is the best curse we can use, and it needs to be cast to activate the effect of the Balance of Terror jewel, which inflicts Wither on hit for 10 seconds after despair was last cast.
- Assassin's Mark triggered by Oskarm applies a good amount of crit chance to rare and unique monsters. Make sure you have Whispers of Doom annointed to your amulet so you can apply both Assassin's Mark and Despair.
- Blood rage can be removed if you feel like it kills your life regen.
- Totems are used against bosses.

As far as upgrades go:
- Awakened Multistrike is huge, but expensive.
- Awakened Void Manupulation is fairly affordable.
- Don't forget to put quality on gems that make good use of it, or trade for gems that have quality to begin with.


-----	-----	-----	-----	-----	-----	-----	-----	-----	-----	-----	-----
										RARE MACE CRAFTING
-----	-----	-----	-----	-----	-----	-----	-----	-----	-----	-----	-----

NOTE:
I only included my own crafting processes as I know for sure they will be completely deterministic.
There might be more ways to craft the 2nd mace that will be better. I am not an extremely experienced crafter.
Mind you that in case you roll attack speed and crit chance naturally alongside the aoe scaling, just craft chaos penetration and call it a day.


RARE MACE VERSION 1 - BUDGET
AoE Scaling + Spell Damage + Crafted Crit Chance / Attributes + Crafted Chaos Penetration
Crafting cost: ~5-10 Divine Orbs

Crafting Base: Item Level 83 Elder Influenced One-Handed Mace (preferably a Behemoth Mace or Boom Mace)

Materials:
- 150+ Screaming/Shrieking Essence of Woe (Spell Damage) - the only variable investment as it depends on rolling rng
- Orbs of Annulment (in case the essence fills too many affixes)
- 1 Divine Orb for crafting multimod
- Some chaos orbs for the final crafted mods

Process:
1. Use Essence of Woe until you hit the suffix "3% increased Area of Effect per 50 Strength"
2. If you have 2 open suffixes and at least 1 open prefix, proceed. If not, try to use Orb of Annulment to get to this state. If you roll off Spell Damage or AoE scaling, restart.
3. Craft "item can have multiple crafted modifiers"
4. Craft Critical Strike Chance and Strength/Intelligence, and craft Chaos Penetration (unlocked through unveiling certain Betrayal weapons)
5. (Optional) Apply "1% increased attack speed per 8% quality" weapon enchant with the Harvest bench and get the item to at least 24% quality using Hillock for an additional 3% attack speed.
Done.


RARE MACE VERSION 2 - MID-RANGE
AoE Scaling + Chaos Penetration + Attack Speed + Crafted Crit Chance / Attributes + Crafted Spell Damage
Crafting cost: ~40+ Divine Orbs

Crafting Base: Item Level 83 One-Handed Mace WITH HEIST ENCHANTMENT "Can have an additional crafted modifier" - IMPORTANT! HARD TO FIND. CHECK TRADE OFTEN. GOOD BASES CAN GET VERY EXPENSIVE.

Materials:
- Elder-Influenced One-Handed Mace (this will be consumed, don't spend more than 20c)
- Hunter's Exalted Orb
- Awakener's Orb
- 150+ Shrieking/Deafening Essence of Zeal (Attack Speed)
- Syndicate Mastermind's Lair with T4 Aisling in Research
- Orbs of Annulment (in case the essence fills suffixes)
- 4 Divine Orbs for crafting "Suffixes cannot be changed" twice
- Some chaos orbs for crafted mods

Process:
1. Slam Hunter's Exalted Orb on the crafting base
2. Use Awakener's Orb on the Elder Influenced Mace, and apply it to the Hunter influenced crafting base.
3. Roll Essence of Zeal until you hit the suffix "3% increased Area of Effect per 50 Strength"
4. If you have 1 open suffix, proceed. If not, try to use Orb of Annulment to get to this state. If it rolls off either Attack Speed or AoE scaling, restart.
5. Craft "Suffixes Cannot Be Changed"
6. Use Orb of Scouring
7. Craft any non-veiled Suffix (just take the cheapest fire resistance)
8. Craft "Suffixes Cannot Be Changed"
9. Use T4 Aisling to craft a veiled modifier. Because we blocked our suffixes and crafted a third suffix (eg. fire resist), it can only roll a veiled prefix modifier. DO NOT UNVEIL IT YET.
10. Use crafting bench option "Remove crafted modifiers".
11. Craft "Elemental Penetration" prefix.
12. Unveil, this will guarantee that one of the options is "14-16% Chaos Penetration"
13. Use crafting bench option "Remove crafted modifiers" again
14. Craft "%increased Crit Chance + Strength & Intelligence"
15. Craft "Increased Spell Damage"
Done.

(I have no idea if enchanting the weapon to grant attack speed per quality bricks the two crafted modifiers, take care)


RARE MACE VERSION 3 - HIGH-END
AoE Scaling + Fire Damage Scaling + Chaos Penetration + Attack Speed + Crit Chance + Crafted Spell Damage
Crafting cost: I don't know.

I have no idea how to craft this. It's just here to show you what the high-end upgrade is.
I haven't included it in the build because you need an Original Sin to make use of the fire damage scaling. You would need a mirror and then some to get this upgrade.