10 months ago
 Level 97 MoM Storm Burst Totem Hierophant3.24
Life: 4,16999%
ES: 396
Mana: 4,044295%
eHP:
89,683
Resistances: 75%/75%/75%/68%
Armour: 10,396
DPS: 11,386,497
Speed: 7.36
Hit Chance: 100%
Config:
Pinnacle, 30% Shock, Frenzy, Custom Mods
Bandit: Kill All
Pantheon: Soul of the Brine King, Soul of Garukhan
Gear

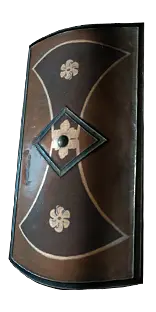
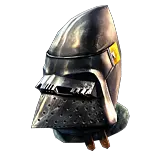
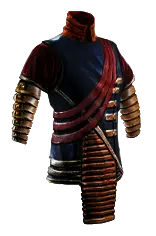
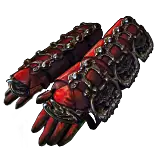


Gems
---------- ENDGAME ----------
Storm Burst
Spell Totem
Physical to Lightning
Lightning Penetration
Cruelty
Controlled Destruction
Wave of Conviction
High-Impact Mine
Charged Mines
Vitality
Decoy Totem
Multiple Totems
Flame Dash
Determination
Arcane Cloak
Arcane Surge
Arcane Surge
Sigil of Power
Storm Burst
Infused Channelling
Conductivity
Wrath
Divine Blessing
Inspiration
---------- LEVELING ----------
Tree Preview
- 6% increased Cast Speed for each different Non-Instant Spell you've Cast Recently
- 10% more Skill Effect Duration
- Exposure you inflict applies at least -18% to the affected Resistance
- +15% chance to Suppress Spell Damage if Equipped Helmet, Body Armour, Gloves, and Boots all have Evasion Rating
- 15% increased maximum Life if there are no Life Modifiers on Equipped Body Armour
- Increases and reductions to Maximum Mana also apply to Shock Effect at 30% of their value
- 12% increased Mana Reservation Efficiency of Skills
- 5% of Damage from Hits is taken from your nearest Totem's Life before you
Notes
Build made by Tatiantel2
If you have any questions/suggestions - feel free to ask in chat on Twitch (streaming every day):
https://www.twitch.tv/tatiantel2


------ TRADE / MIN-MAXED VERSION OF THE BUILD ------
In my Trade version of the build I used unique items and better-rolled rare items. I didn't sacrifice defences at all (EHP goes from 89k to 102k), while getting almost 3 times more damage (30.2mil Full DPS).
The min-maxed pob:
https://pobb.in/Y7Xr9jdx0_33


------ HOW STORM BURST WORKS ------
In order to scale Storm Burst damage we can use all the normal sources of Spells scaling like: Cast Speed, Elemental Damage, Spell Damage, Elemental Penetration.
But the unusual and the most efficient way to scale DPS is to scale Skill Effect Duration.
While Totems channel the Storm Burst Spell, the skill creates Orbs that last 1.6 seconds (with 20% quality on Storm Burst Gem), and jump each 0.4 seconds. When the orb jumps it does damage. The intervals at which orbs jump
cannot be changed (always 0.4s), but the duration of orbs can be extended.
So, by default orbs jump 4 times (1.6s / 0.4s). If we scale duration of the orb to 2.0s it will jump 5 times instead, and that equals to 25% more damage, because the amount of Orbs spawned is the same, but each Orb jumps additional time.
To get 2.0s orb duration, we need 25% increased Skill Effect Duration (1.6s * 1.25 = 2.0s).
Obviously, next duration thresholds are: 2.4s, 2.8s, 3.2s etc. It corresponds to 50%, 75%, 100% etc increased Skill Effect Duration.
In this build we take 90% increased and 10% more duration from tree, plus 15% increased from Elder Boots. This results in 125% increased duration. This duration gives 125% more Full DPS. It is possible to scale duration even further,
but sources of this stat are scarce.


------ PLAYSTYLE ------
Mapping.
In maps we don't need to press many buttons, totems will do all the work.
Place totems in front of you, closer to the pack of monsters.
When encountering bigger pack of monsters - place Decoy Totems in the middle of a pack. Decoys have big AoE Taunt, so monsters will group around Decoys, and you and your SB totems will not get hit.
Against packs of monsters with Rares (or when you need more damage) cast Conductivity Curse and Wrath Aura (temporary aura linked to Divine Blessing Support) after you placed all the totems.

Bossing.
Against tougher enemies the "rotation" of skills is as follows:
1. Place Storm Burst Totems
2. Place Decoy Totems if not on cooldown (to not get hit and lock Boss in place)
3. Cast Conductivity Curse
4. Place Sigil of Power
5. Use Wrath aura (temporary aura linked to Divine Blessing Support) while inside of Sigil of Power circle - to improve it to the next stage
6. Cast selfcast Storm Burst for 0.6+ seconds (to proc Infusion buff that gives totems +16% more damage)
7. Throw and detonate few Stormblast Mines (or Wave of Conviction Mines) until you get 3 Frenzy charges (from Charged Mines Support)
8. (optional) While not busy with replacing totems or dodging boss mechanics, keep throwing Stormblast Mines (or Wave of Conviction Mines) without detonating them (in order to proc 3% increased damage taken on Monsters from Mine skill gem)

This rotation of skills might seem overwhelming but you get used to it pretty quickly. Totems last 20+ seconds, and they are tanky, so there's plenty of time to do something else - like throwing Mines and
maintaining Frenzy Charges from them.

Arcane Cloak (or Steelskin while leveling) - this skill is linked to Automation Support, so it will be automatically activates once it's not on a cooldown.

How Sigil of Power works:
Your char has to be inside of the circle created by Sigil of Power in order for totems to have extra damage. It doesn't matter where your totems are. The timing also doesn't matter - whenever you are in the circle ALL totems get
extra damage (all totems summoned before or after placing the Sigil). So you can freely walk out and back in the circle if needed - the extra damage is automatically reapplied once you're back in the circle.
Getting to maximum stages of Sigil of Power is fairly easy, because each cast of Divine Blessing Aura or Arcane Cloak immediately triggers +1 stage.


------ LEVELING ------
In "Tree" section at the bottom you can select different trees for different Levels to see which passives to take at each stage.
In "Skills" section you can see which skills to use at each Level. You don't need to use all the gems here if you don't have enough sockets in gear. Gems that are ok to not use marked with "(not important)" in "Skills" section.

As shown is Skills section we level with Holy Flame Totem and Flame Wall, this combination of skills can clear early acts pretty easily.
It is also possible to mule Sniper's Mark curse, which will increase damage of Holy Flame Totem even more. "To mule" means - you create a Duelist, and get to Submerged Passage waypoint with it, then Sniper's Mark will be offered
as a quest reward.
Adding Wave of Conviction Mines as early as possible (level 16) is recommended. Make sure that your highest elemental damage dealt with WoC is fire, so that you apply Fire Exposure.
If it's not fire, it is recommended to get some flat fire added damage to spells on your Wand. Also you can add Added Fire Damage Support to WoC + Blastchain Mine.
After we switch to Storm Burst Totems, make sure you're applying a Lightning Exposure now (instead of Fire for Holy Flame Totem).
We use Wave of Conviction Mines until we get Gloves with "Inflict Lightning Exposure on Hit, applying -11% to Lightning Resistance" implicit mod (explained in "------ EXPOSURE DEBUFF ------"), and once we get it
we switch to Endgame setup - Stormblast Mines.

Switching to Storm Burst Totems - at around Level 32, once first Labyrinth is completed.
Switching to Mind over Matter - at around Level 57, once second Labyrinth is completed. It gives really good source of Mana Regen, so it makes having damage taken from Mana less painful.

Manacost of Storm Burst Totems is really low (especially in comparison to Holy Flame Totems), so we only start using Determination Aura after we switch to Storm Burst.

After you'll get Exposure on hit on Gloves implicit, switch Wave of Conviction Mines to Stormblast Mines: Stormblast Mine + Charged Mines + Swift Assembly


------ IMPORTANT GEAR ------
The most important items in the build are: Shield with Shaper Influence and Boots with Elder influence.
On the Shaper Shield ilvl70+ it's possible to have a "+1 to maximum number of Totems" prefix. This gives us 35% more damage, and good QoL.
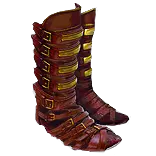
On the Elder Boots ilvl68+ it's possible to have a "Socketed Gems are Supported by Level 15 Increased Duration, (10-15)% increased Skill Effect Duration" suffix. This also gives a very solid dps boost, since we get to the next duration threshold.
Before we get Elder boots, we should use Increased Duration Support linked to Arcane Cloak and Sigil of Power. In order to get the socket - don't use Culling Strike Support on self-cast Storm Burst.
Having up to 16% Cast Speed on Rings is very nice too, and it's pretty easy to craft - spam "Reforge Caster modifier" on Harvest Station.


------ EXPOSURE DEBUFF ------
Exposure is a debuff that lowers enemy's Elemental Resistance.
The best way to apply exposure with this build is to get implicit on gloves "Inflict Lightning Exposure on Hit, applying -11% to Lightning Resistance". You can get it by spamming Eldritch Ichors on Gloves until you randomly
get this mod. Lowest tier Ichors give 11% Exposure, Grand Ichors give 13% - the difference is not too big, so it's not worth investing in higher tier Ichors (unless there's nothing else to upgrade anymore).
With this implicit mod Totems will automatically always apply Exposure.

But BEFORE you can get your hands on such Gloves (hehe), there are 2 ways to apply Exposure:
1) Throw and detonate Wave of Conviction Mines - recommended option (shown in Leveling Gems section);
2) Cast Hydrosphere (also can link to Hextouch+Conductivity).
Option 1 is far better, because it applies 15% Exposure (vs 10% from Hydrosphere), plus you get Frenzy and Power Charge generation, and there's "2% chance to deal double damage" to enemies
around Mines (from High-Impact Mine Support), which applies to Totem Damage.
Only use option 2 (Hydrosphere) if you're looking for much lazier playstyle (and you're ok with losing a lot of damage), because you get both Exposure and Curse with 1 button press. Triggering Curse from Hextouch
also result in damage loss, because Hextouch Support has less effect of curse on it. So I strongly recombend reading the "Can I not use Mines" paragraph first.


------ CAN I NOT USE MINES? ------
Short answer: YES, BUT
Mines are really efficient because of few reasons:
1) Mines provide the easiest accessible source of Frenzy Charge generation (from Charged Mines Support), plus at the same time they generate Power Charges too (which help with proccing Elemental Overload more consistently);
2) Stormblast Mines have aura around Mines, which makes enemies take 4% increased damage per mine. That's effectively 4% more damage per Mine in most cases (which means from 10 mines it's almost 40% more DPS multiplier);
3) Before you get Exposure Gloves, Wave of Conviction Mines apply big Exposure (15%), and give 2% more damage to enemies around Mines (instead of 4% from Stormblast Mines, but still good).

So I would really recommend trying to overcome this initial struggle and play with Mines for few days, because eventially they will even become enjoyable to use.
I would recommend binding Mine Throwing Key and Detonate Mines Key to 2 buttons that are next to each other on the keyboard - this way it doesn't feel like you need to press 2 buttons.
For example, I use "W" for Mine and "E" for Detonate, and when I want to use Mines I hold down "W" with middle finger and spam "E" key with pointing finger. It's also possible to just press and hold down both keys simultaneously.

IF Mines still don't work for you, then you need to at least find different source of Frenzy Charges. Possible ways:
1. Craft Minimum Frenzy Charge on Rings and Amulet.
This gives permanent Charges, but most likely you'll have to sacrifice other stats on jewellery in order to be able to craft these Minimum Charge mods;
2. Use Cold Snap / Vaal Cold Snap.
This is very unreliable source of Charges;
3. Use 4-link setup: Frenzy - Additional Accuracy - Greater Multiple Projectiles - Faster Attacks.
This uses a lot of sockets on gear, and not much lazier than using Mines.

As you can see, all these sources have their own downsides.


------ EXTRA DEFENSIVE LAYERS FOR HARDCORE ------
Since the damage on this build is very high, it is ok to switch the Curse from Conductivity to Enfeeble - it will add a great amount of survivability.
Also we can add additional Elemental Ailment mitigation - we can roll on Gloves implicit (with Eldritch Embers) "Chance to Extinguish enemies oh hit" instead of chance to Unnerve. Extinguished enemies cannot apply any elemental ailments.


------ FAQ ------
Q: Which Pantheon power, Bandit choice?
A: Bandits: kill all. Pantheon: Soul of Brine King, Soul of Garukhan.

Q: Is it ok to use Multiple Totems Support in main totem link?
A: No. The Support itself will provide only 20% more overall damage, but will reduce hits of each totem, which reduces Shocks they apply. So in comparison this Support is a big dps loss over any other option.
    Also using Multiple Totems Support in main skill link reduces mapping speed, because we can place totems only in 3 different spots (3x2 totems), instead of 4 different places (4x1 totems), so overall coverage of damage reduces.

Q: Soul Mantle with Self-Flagellation is a good option?
A: Combo of Soul Mantle, Self-Flagellation, Viridi's Veil and Coward's Legacy with Pain Attunement from tree. It gives total of 60% more damage, and 55% less Effective Hit Pool. Right now the build has very good damage, and good defences.
    Swapping to Soul Mantle will make it into: great damage and bad defences. I think it's not worth it, since instead of well-rounded build we're gonna get closer to glass-canon'ish build.

Q: Can we use Eternal Blessing Support for Determination Aura to not reserve mana?
A: We use Divine Blessing Support on Wrath Aura. It's only possible to use 1 Blessing.

Q: Do we really need Determination? It doesn't improve "Phys Max Hit", and we only have 10k Armour anyway.
A: Armour is more effective versus smaller / medium phys hits. And in maps smaller phys hits is the most common type of damage. While Determination doesn't help vs big one-shots, it is extremly effective for mapping, and vs Bosses auto-attacks.
    Determination also gives out Totems (and Decoy Totems) more Armour, so it makes them more durable too.

Q: Why do we use a self-cast Storm Burst in addition to Totems?
A: After channeling self-cast Storm Burst for 0.6 seconds, we get Infusion buff for 12+ seconds. This buff gives us 16% more damage, and that damage works for totems.

Q: Can we use Shield Charge?
A: Yes. Remove Culling Strike Support from self-cast Storm Burst, and remove Swift Assembly Support from Stormblast Mines. Now we have two sockets for Shield Charge + Faster Attacks Support.

Q: Increased Duration Support or Inspiration Support should be better link for Storm Burst than Cruelty Support? What about Concentrated Effect Support?
A: It may seem that Increased Duration Support is biggest DPS support out of these 3 options. But Cruelty Support gives more damage multi - and that gives bigger hits, which results in bigger Shocks. And higher shock value makes it so that
    Cruelty Support is the same % more DPS as Increased Duration Support. So Cruelty gives same damage, but faster, because Increased Duration Support would increase the ramp time until totems get to full damage.
    We can't use Inspiration Support, because we have have to use this Support on our Wrath + Divine Blessing in order to keep the manacost bearable. Inspiration charges get removed after we spend 800 mana on skills with Inspiration Support.
    The cost of Wrath Aura will be more than 1000 mana, which means that every time we cast it, Inspiration charges will be removed -> no extra damage for Storm Burst.
    Concentrated Effect Support gives less AoE, which will reduce the amount of Storm Burst orbs that hit the target. This results in less damage.

Q: How does Sigil of Power work - do my totems need to be in the circle?
A: Your char has to be inside of the circle created by Sigil of Power in order for totems to have extra damage. It doesn't matter where your totems are. The timing also doesn't matter - whenever you are in the circle ALL totems get
    extra damage (all totems summoned before or after placing the Sigil). So you can freely walk out and back in the circle if needed - the extra damage is automatically reapplied once you're back in the circle.
    Getting to maximum stages of Sigil of Power is fairly easy, because each cast of Divine Blessing Aura or Arcane Cloak immediately triggers +1 stage.


Build made by Tatiantel2
If you have any questions/suggestions - feel free to ask in chat on Twitch (streaming every day):
https://www.twitch.tv/tatiantel2