8 months ago
 Level 100 CI Crit Kinetic Blast of Clustering Hierophant3.27
Life: 1
ES: 25,663
Mana: 147
Int: 1,974
eHP:
213,372
Resistances: 75%/75%/75%/-25%
Evade: 88%
Evasion: 49,576
DPS: 38,819,528
Speed: 5.06
Hit Chance: 100%
Crit Chance: 97.70%
Crit Multi: 471%
Config:
15x Wither, Custom Mods
Bandit: Kill All
Pantheon: Soul of Lunaris, Soul of Gruthkul
Loadout
Gear


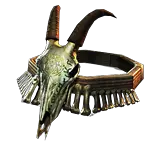


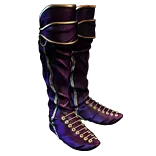










Gems
Kinetic Blast of Clustering
Increased Critical Damage
Awakened Vicious Projectiles
Awakened Fork
Returning Projectiles
Precision
Grace
Haste
Enlighten
Cast when Damage Taken
Sniper's Mark
Mark On Hit
Wall of Force
Trap
Advanced Traps
Clarity
Shield Charge
Faster Attacks
Frostblink
Despair
Spellslinger
Tornado
Tree Preview
Tattoo of the Ramako Fleetfoot(x3)
2% increased Movement Speed
Tattoo of the Tasalio Warrior
5% chance to Blind Enemies on Hit with Attacks
 Huntleader
 Chaos Inoculation
 Ghost Dance
 Ghost Reaver
 Attributes Mastery
- 5% increased Attributes
 Energy Shield Mastery
- 50% of your Energy Shield is added to your Stun Threshold
 Evasion and Energy Shield Mastery
- 1% increased Evasion Rating per 5 Intelligence
- Dexterity provides no inherent bonus to Evasion Rating
 Leech Mastery
- 5% of Leech is Instant
 Mana Mastery
- 12% increased Mana Reservation Efficiency of Skills
 Wand Mastery
- Intelligence is added to Accuracy Rating with Wands
- Wand Attacks fire an additional Projectile
Notes
Guide by Allie
https://www.twitch.tv/Allliee_
https://www.youtube.com/c/Alliee

I stream on Twitch every single day! If you have a question feel free to come by and ask!

>>>>>PLEASE READ THIS<<<<<

I have a Leveling Run from Level 1 all the way to Act 10 which will hold your hand and show you what to do on YouTube.
If you are new to the game or would like to level along with me, you can find it here.

I will also be playing this build on Day 1 of Keepers of the Flame on Twitch if you would like to come and watch it all live!

Leveling Run - https://youtu.be/fU6d1klfA1Y

>>>>>PLEASE READ THIS<<<<<


Act 1

Look for Movement Speed boots in Town & use two Sceptres. Vendor Armor Scraps or Whetstones for more Wisdoms.
Look for BBB anything in Town before going to the Coast. If there is no BBB, then look for a BB 2-Link at a minimum. A Wand can be used if needed.

If you happen to find a +1 Fire/+1 Spell Wand/Sceptre then you should use that for most of Act 1. Grab a second Wand if this does happen on a Wand base.
You can Weapon Swap to 2 Sceptres for Leap Slam until you find a good replacement if you want, or just swap over to using 2 Sceptres full-time at Level 10 with Leap Slam.

>>>>Please make sure you have 2 Mana Flasks before Brutus and Merveil or you will have a bad time with mana<<<<

Act 1 Regex (shows 4-Links, BBB, BB, MS Boots, Sceptres): "-\w-.-|b-b-b|b-b|Runn|rint|ll g|s:.+sc"
Copy this and then paste it into the search box on Gear Vendors to highlight these things if they have them.


Breach

In 3.27 we are getting the Breach rework and alongside it, new Grafts.
These are items you can attach to yourself providing you with new Active Skills, Buffs, and other Utility skills.

From what we've seen, these are VERY strong and should make leveling a whole lot easier.
You DO NOT need to do Breach or interact with it at all while leveling and can ignore it but, if you choose to do it, your leveling experience will be easier as you will get a lot of loot and powerful Grafts.

I cannot tell you exactly what to use, but all Grafts do not scale with ANY of your stats and are completely separate from your build.
Try them out and see which ones work and are fun. In Maps we will optimize these but for now the choice is up to you.

Most of the Active Skills look downright broken and very strong.


Level 1
Take Rolling Magma from the quest and link it to Elemental Proliferation.
Use Rolling Magma for everything up until Level 28.

Try to get Rolling Magma to Level 2 in The Coast. This will make the next zone a bit easier with Rhoas.

Rolling Magma will bounce 4 times from the point at which your Cursor was at. The bounces will always jump the same distance and can multi-hit enemies with bigger hitboxes, namely Bosses.
Try to aim slightly in front of any Boss you are fighting so it can potentially get hit by multiple bounces.

For clearing you simply will just put down a Flame Wall once you obtain it at Level 4, and aim for your Rolling Magma to go through it to gain Added Fire Damage.
This isn't very precise and you don't need to overthink it. Just put the Flame Wall on top of yourself or on top of a Boss.


Level 4
After Mud Flats is over and you are in The Submerged Passage, teleport back to The Coast waypoint and go get the Medicine Chest from the Tidal Island.

Take Flame Wall & Frostblink from Tarkleigh.
Take Arcane Surge from Nessa.
Buy Holy Flame Totem from Nessa.

Link Rolling Magma - Elemental Proliferation - Arcane Surge
Leave Arcane Surge at Level 1, you can dismiss the Level-Up notification by Right-Clicking on the +.

If you do not have space, link Arcane Surge to Frostblink.

Use Holy Flame Totem on Bosses. You can use it on Rares too if needed.
Use Frostblink on cooldown as your Movement Skill.

At Level 5 you can use Darkwood Sceptre bases, try to look for one from Tarkleigh or the floor.

You will get a guaranteed Essence from the Dweller. Use it on your Sceptre in hopes for % Spell Damage, % Fire Damage or any Added Spell Damage.
If you get a second Essence from a random monster as your level, you should use them on your Weapons only to try and get an upgrade.


~Level 8-9
Once you get to the Prison, you should take the Waypoint back to Town.

Take Combustion from Nessa and link it to Rolling Magma in place of Arcane Surge.
Move Arcane Surge to Frostblink if you haven't yet.

Buy Added Fire Damage from Nessa and link it to Holy Flame Totem.
This will simply help kill Brutus and Merveil faster and is not a high priority if you do not have anything with RR.

Buy a second Mana Flask and upgrade your other one if you have not done so yet.
Having two good Mana Flasks will make Brutus a lot easier.

After Killing Brutus

Take Clarity from the quest reward offered by Tarkleigh. Socket this when you can and activate the Aura. Leave this at Level 1.

Buy Leap Slam from Nessa. You should now use Leap Slam alongside Frostblink for even faster mobility.
You can press Frostblink as you are about to land with Leap Slam to animation cancel it, making you overall faster.

Keep Leap Slam at Level 1 as it does not gain any extra speed from additional levels and it only increases Mana costs.
Make sure to always use 2 Sceptres from now on until Act 7. This will give you a passive Dual Wielding bonus which gives you Attack Speed making Leap Slam faster.

From here, just finish up Act 1 as there are no more changes.


Weapon & Gear Stats Act 1-7

For Act 1 it largely does not matter what stats you have on your gear but it is worth briefly discussing what to look for.

First, you should always look for Boots with Movement Speed on them. Check the Gear Vendor in each Town whenever you have to go back and use the Regex to quickly find any.
You can always use Gold to Gamble for Boots if needed. If you have Boots, then use your Gold to Gamble for Sceptres as needed.

On all of your Gear you are just looking for Life and Resistances. It does not matter what Base you use but if possible, try to use Armour Bases.
Try to use a Body Armour with no Life rolls on it. This will allow you to pick up the 15% Increased Life Mastery which is significantly stronger.

Lastly, on your Weapons you are looking for % Spell Damage, % Fire Damage & any Adds x Damage to Spells rolls.
You have a preference for Added Fire Damage to Spells but all three types are a DPS increase.

Cast Speed also feels good as well but it is not as high of a priority.

If you find a Scpectre with +1 Spells or +1 Fire Spells, you should keep that for a very long time.
In Act 2 you will unlock the ability to use the Crafting Bench in your Hideout after helping Helena in the Chamber of Sins. Use the Bench to craft a useful Prefix if said +1 Sceptre has an Open Prefix.
I would not recommend wasting currency doing this on anything else than a +1 Weapon.


Act 2

BANDITS: Help Alira, +15% Elemental Resistance is too good for Leaguestart. Later, we will swap to Eramir for +1 Passive Point once we are in Maps.

The swap to Eramir will happen once you have swapped to the Mana Stacking setup with Kinetic Blast of Clustering.
To swap to Eramir in Maps, simply vendor 20 Orbs of Regret and 1 Onyx Amulet together and you will receive a Book.

Wiki Page - https://www.poewiki.net/wiki/Deal_with_the_Bandits


Level 16
Take Herald of Thunder as your quest reward from Greust.
Buy Herald of Ice & Arcane Cloak from Yenna.

Turn on both Heralds for a DPS increase. Your Mana should feel fine as long as you have an upgraded Mana Flask.
Put Arcane Cloak in your Off-Hand to gain Experience for Act 4.


Level 20
Take Faster Casting from Silk after you kill The Weaver, put this somewhere to gain Experience.
You will use this as your 4-Link if you get a BBBB item in Act 3.


Act 3

Start looking for:
BBBX for Rolling Magma - Elemental Proliferation - Combustion - 4th Support (more below)
RGG for Leap Slam - Faster Attacks - Momentum

Our goal is to get a 4-Link as soon as possible for Rolling Magma. Luckily our 4th Support is flexible and Cruelty & Faster Casting both work. Sadly you cannot buy Added Cold Damage.
This means as long as it has BBB you are ok with any 4th-Link.

Cruelty can be bought in Act 2, and you should have a Faster Casting from Silk.

Check Hargan every time you come back to Town as he has a chance to sell 4-Links.

At Level 28 we will be swapping from Rolling Magma to Firestorm as it feels significantly better to use.
We will be using this all the way until Act 7 when we will swap over to Power Siphon after the Second Lab.

Pick up all Yellow items, you are going to need lots of Alterations to buy all of the gems.


Level 24
Take Flammability from Maramoa and buy Purity of Elements, Automation & Anger from Clarissa.

Start using Flammability on Bosses for extra DPS.

Remove both Herald of Thunder & Herald of Ice and replace them with Anger.
Put Purity of Elements & Automation in an Off-Hand Weapon to gain Experience for later on.

Level 26

You should stop at Maramoa and Gamble some Energy Shield only Gloves.
Level 26 is the breakpoint for you having a 50/50 chance to find one with a 4-Link.

If you don't get one that is ok, just keep going. You can try this later if needed or you can save your gold for later.


Level 28
In the Ebony Barracks kill General Gravicius then go back to Town.

Take Firestorm from Maramoa and replace Rolling Magma with it.
Remove Elemental Proliferation and replace it with Arcane Surge from Frostblink. You should start leveling it now.

Use either Cruelty or Faster Casting as your 4th Support based on what 4-Link you found.

You can now get rid of Holy Flame Totem & Flame Wall along with the Added Fire Damage.

From now on you will just use Firestorm to clear along with Flammability on Bosses.


Level 30
Go to the Library and do the quest for Siosa.

Take Arrogance as your quest reward.
Buy Power Siphon, Faster Attacks, Momentum & Ballista Totem from Siosa.

If you happened to get a 4-Link that has a Green Socket you can also buy Added Cold Damage here.

You can also use this Regex: Power Siphon|Faster attacks|Momentum|Ballista totem|Arcane Cloak

Link Faster Attacks & Momentum to Leap Slam as soon as you can for a large Movement Speed increase.
Put Power Siphon, Arrogance & Ballista Totem in your Off-Hand to gain Experience for Act 7.

If you do not have the correct colors as we are now leveling 6 Gems, prioritize Power Siphon, Ballista Totem & Arcane Cloak.
Automation, Purity of Elements & Arrogance can always be leveled later on when you can fit everything.

Buy an extra Kinetic Blast for Lab in Act 4. You don't need to level this, just keep it in your inventory.


Act 4
Start looking for BBRG to be able to swap to Power Siphon in Act 7. I am mentioning this now as it might take a while for you to find this.
Start picking up every Wand you see as you must use one with Power Siphon. The ideal Wands are ones with Added Lightning Damage & % Spell Damage at the least.

Getting A "Free" 5-Link

Thanks to Ziggy for discovering this. There IS a chance this will be nerfed.
You can see a small example of this at 15:24 in this video - https://www.youtube.com/watch?v=x00nIXnU-_U

With the new Breach rework, you can now birth items at the Genesis Tree. To do this you will need Graftblood which is gained from killing Breach monsters and the rare drop, a Provisioning Wombgift.
You will sometimes get these from doing the "Big" Breaches where you need to protect the NPC from Waves while breaking down walls.

These Wombgifts can then be birthed into items and, in Act 4 we reach the breakpoint where you can start getting a 5-Link.
If you have been doing Breach as you have been progressing, at this point you should have enough Graftblood to unlock quite a few Passive Points on the Genesis Passive Tree.

What you will want to do is to path up to Arterial Mesh in the Top Left Equipment Tree which will cause every item you birth to come with 150 Jeweller's and Fusing Orbs used on them for free.
A 5-Link on average takes ~100 Orbs to hit meaning this has a very high chance to give you a 5-Link item if you birth a Body Armour.

You will also want to pick up some of the starting points to further focus the birth into giving you Body Armours by picking up Guardian Flesh and the 5000% Body Armour point behind it.
You should also pick up the 300% More Chance of Int Requirements Small Passive in the Middle Branch at the start.

With this, you will have a very high chance to get a Body Armour that will be skewed towards it requiring Int, with a very likely 5-Link.
You can then take this, and Chromatic Orb it as needed to turn into a usable Body Armour.

As a 5th-Link you should add either Faster Casting, Cruelty or Added Cold Damage.
Once you get to Act 7 and are ready to swap to Power Siphon, you will need to get at least 1R on it to make it usable.


Lab

Buy a Kinetic Blast from Siosa before doing Lab. Once you complete it, you are given one use of the Font.
The Font will allow you to change a Skill Gem into a random Transfigured Skill Gem of the same color. Simply use your Kinetic Blast for this and pray for the somewhat low chance for you to be offered Kinetic Blast of Clustering.

Starting with the Act 10 Lab, there is a chance to get an option that says something along the lines of "Change a Skill Gem into its transfigured version."
This will instantly allow you to change Kinetic Blast into Kinetic Blast of Clustering which is the superior version of the skill allowing us to start properly Mana Stacking.

Do Lab after Level 31 when your gems upgrade. Do your best do dodge all of Izaro's skills, you can swap Anger out for Purity of Elements if needed.
While Izaro has some Elemental skills, his Heavy Attack & Auto-Attacks are significantly deadlier. Stay near him while constantly running behind him.

Pick up Conviction of Power as your first Ascendancy Node.

If you happen to get Kinetic Blast of Clustering, you should keep leveling it as before. You will not use this until Maps due to us having very little Mana to make it worthwhile over normal Power Siphon.

NOTE: It's completely ok if you do not get Kinetic Blast of Clustering while leveling. Obtaining it will be our first goal as soon as we get to Maps anyways and it is simple to farm if you wish to get your own.
Think of it as a lucky outcome if you do end up getting it earlier.


Level 36
After killing both Kaom and Daresso and opening the Door to The Belly of the Beast, go back to Town and grab Unleash from Dialla.

Link Unleash to Firestorm - Unleash - Combustion - Arcane Surge.

If you have a 4-Link that has a Red or Green Support, then replace Arcane Surge with Unleash.
Start looking for a BBBB if you do not have one yet to add Arcane Surge back in.


Level 38
After killing Malachai take Ice Golem from Oyun and put it in your Off-Hand to gain Experience for Act 7.

Buy Eternal Blessing & Sigil of Power from Petarus and Vanja and link it to Anger while removing Clarity.
If you do not have any Alchemy Orbs you can do this whole step later. Priotize Eternal Bleesing to setup Arcane Cloak as mentioned below.

Take Arcane Cloak & Automation from your Off-Hand and link them together.

Note - Make sure you activate your Automation skill. You cannot use Arcane Cloak manually and Automation needs to be turned on just like an Aura for it to trigger Arcane Cloak.

Go back to Act 3 and buy More Duration from Clarissa, link it to Sigil of Power.

If you do not have the space to run Arcane Cloak & Sigil of Power yet, that is fine; you can always add them in as soon as you can.
Sigil of Power is also fine to use by itself with no More Duration.

Eternal Blessing will make Anger reserve no Mana giving us access to our full Mana Pool again. This will allow us to use Arcane Cloak as a defensive tool and as a way to gain extra Added Lightning Damage.
In Act 5 we will also pick up Mind Over Matter allowing you to use your Mana as an extra Health Pool.

You will need to keep using your Mana Flask to keep up with your Mana Sustain but Arcane Surge should take care of most of it.


Act 6

Do Lilly's Quest to clear the Beach as soon as you get to Act 6. Nothing is changing in Act 6 other than starting to collect Heist Contracts.

>>>>>PLEASE READ THIS<<<<<
>>>>>PLEASE READ THIS<<<<<


Once you get to Act 6, you can start setting up Heist so you can go and do 1-2 Hours of Heist as soon as you get to the end of Act 10 which will make you ~100-200 Chaos Orbs.
With this you will easily have more than enough currency to buy starting items we need such as Mind of the Council, Piscator's & Malachai's Loop and good Rare items in all slots.

You can choose to not do Heist but, Earlygame Maps earn you basically 0 currency meaning you will have to wait quite a while to see any of the core items.
While this is fine as Power Siphon can handle all content very well, if you wish to have the easiest time possible, I STRONGLY recommend to do Heist.
You don't even need to do all Contracts, simply doing enough to buy Mind of the Council & good Rare items is enough.

Heist is extremely easy to do but it is something you NEED to start working on Act 6. You will need to stop every level and buy Contracts from the Heist vendor to stock up before finishing Act 10.

Faustus, the Auction House NPC is available in Act 6 as a way to trade with other players.

Buy 1 Chaos worth of Rogue Markers from the Auction House in Kingsmarch to get you going ASAP with collecting Contracts.
You can also buy Chance Orbs if you ever run out of them and you can quickly make 1-2 Chaos by doing 1-2 Lockpicking Contracts.

Use this Regex to buy Contracts - Lockp|Percept|Demo

If you are a new player following this guide, I would most likely recommend going down the Heist path.
It will not only set you up with more than enough money to begin but, it will teach you one of the best possible starting routes for currency.
While for more advanced players rushing to T16 Maps might be better, I personally think spending 1-2 Hours in Heist is a better and easier option for most people.

Please keep in mind, you DO NOT want to kill Kitava in Act 10. Do all of your Heisting and once its done, THEN go kill Kitava in Act 10.
If you plan to do Heist, I recommend to watch the video guide I have on it.

Heist Guide - https://youtu.be/v4PBenCGMIo


>>>>>PLEASE READ THIS<<<<<
>>>>>PLEASE READ THIS<<<<<


Act 7

Do your Second Lab as soon as you can. Once you finish it, pick up Pursuit of Faith. This will allow you to swap from Firestorm to Power Siphon.

DO NOT SWAP BEFORE YOU DO YOUR SECOND LAB, YOU WILL BRICK YOUR BUILD.
You must have a 4-Link with BRXX at a minimum.

Respec your Passive Tree as shown in the Act 7 tree.

Remove Firestorm and its support gems.
Take Power Siphon, Ice Golem, Ballista Totem & Arrogance from your Off-Hand.

Go to Act 1 and buy Added Lightning Damage, Additional Accuracy, Precision & Shield Charge from Nessa. If the Shield Charge requires too much Strength, go to Lilly in Act 6 and buy a Level 1 copy.
Go to Act 3 and buy Elemental Weakness from Clarissa.
Go to Act 6 and buy Frenzy from Lilly.

Link Power Siphon - Added Lightning Damage - Ballista Totem - Additional Accuracy.
Link Precision - Arrogance. Stop leveling Precision at Level 10.

You can also use Elemental Damage with Attacks, Elemental Focus or Added Cold Damage on a BRXX if needed but you should find a 4-Link that can fit Additional Accuracy ASAP.
At a minium you just need B and R for Power Siphon and Ballista Totem. Try to not use a BRRR item as there is no good 2nd Red Support to use along Elemental Damage with Attacks.

BRBB is just Added Lightning Damage & Elemental Focus.
BRGG is just Additional Accuracy & Added Cold Damage.

Replace Flammability with Elemental Weakness.
Replace Leap Slam with Shield Charge.

Add Ice Golem & Frenzy to any open Socket. If you do not have space for this you can add it in later.


Gear

Doedre's Trade Link - https://www.pathofexile.com/trade/search/Keepers/zb9V0p8qs4

Buy any Shield from a Vendor. Ideally find one as a drop with some Life & Resistances on it.

You can also use your Gold to Gamble for some Wands at Faustus in Town to try and find a good one. All you are looking for is a Wand with Added Lightning Damage, % Spell Damage and Attack Speed.
Anything with two of those stats should work and any extras such as Added Fire or Added Cold are not bad either.

I would also highly recommend to go to your Hideout and use the Crafting Bench to craft Added Lightning Damage onto any Open Prefix on your Amulet, Rings and Gloves.
This will be a massive DPS increase and you should do it as soon as you have the currency for it.

You have likely done a few Heists by now to keep up with the currency needed to buy Contracts and likely have a few Chaos Orbs on hand.
You can use that currency to go and buy a pair of Deodre's Tenure ahead of time as these gloves will be a massive DPS boost in Act 7 and we will be buying them later anyways.

You don't need to do this but it would certainly make the rest of the campaign easier.


We are now a wander!


Keep using Elemental Weakness & Sigil of Power on Bosses as before. Shield Charge can be animation canceled just like Leap Slam was able to with Frostblink.
Ice Golem will serve as a way to gain some more Accuracy Rating and eventually it will be automated so you do not need to keep resummoning it when it dies.

From now on, you will use Power Siphon which will summon a Ballista that will automatically use Power Siphon for you.
You can have 5 of these out at once and they will automatically target enemies a short distance around them. With Pursuit of Faith you can put down all 5 very quickly making this feel very comfortable.
While clearing you just need to put down 2-3 of them before moving forward.

For Rares & Bosses, cast Sigil of Power first, then place down all Ballista Totems, and watch them kill the Boss. You should also press Frenzy as a way to generate Frenzy Charges for more Boss DPS. You do not need to use it while clearing.

The goal is to eventually fully swap to Kinetic Blast of Clustering but to do that we need to make ~100 Chaos Orbs to get the gear needed to make it work. This will be manually cast and we will completely get rid of the Totems.
To get there, we will be playing Power Siphon but, Power Siphon is an awful skill if you attempt to use it manually which is why we are using Ballista Totem to make it good.


Act 10

In Act 10 you can now go and do your third Lab and pick up Ritual of Awakening. This will give you some very strong Life & Mana regeneration along with more DPS.

After doing Lab is when you should go run all of your Heist Contracts if you are doing Heist.

You can go and buy a Grace to use while Heisting over Anger. Your damage should be more than high enough especially if you are buying the Uniques as you make your currency and Grace will make it a lot safer.
It is quite easy to die in Heist if you are not careful especially when you start.
Start with your Low-Level Contracts first to make it as easy as possible.

DO NOT KILL KITAVA IF YOU PLAN TO HEIST, RUN ALL CONTRACTS BEFORE KILLING KITAVA

Once you are done with Heist, go and kill Kitava to get to Maps.


-------------------------------------------------------------

NOTE ON FORMATTING: As this PoB & Guide aims to be an all-in-one guide from Level 1 to... a lot of Mirrors, the rest of the Note Section will be split up into Earlygame, Midgame, Endgame & Mirror Tier chapters going over important topics for each progression point.

All sections will be clearly marked as:
Earlygame -
Midgame -
Endgame -
Mirror Tier -

You might notice some sections with no marker at the start of it. These sections are things that generally will apply to all stages of the build.

-------------------------------------------------------------

==============================================================================================================================================================================================================================================================
----------------------------------------------------------------------------------------------------------------------------------------------------------------------------------------------------------------------------------------------------------------------------------------------------------------------------------------------------------------------------------------------------------------------
----------------------------------------------------------------------------------------------------------------------------------------------------------------------------------------------------------------------------------------------------------------------------------------------------------------------------------------------------------------------------------------------------------------------

----------------------------------------------------------------------------------------------------------------------------------------------------------------------------------------Earlygame----------------------------------------------------------------------------------------------------------------------------------------------------------------------------------------------------------------

----------------------------------------------------------------------------------------------------------------------------------------------------------------------------------------------------------------------------------------------------------------------------------------------------------------------------------------------------------------------------------------------------------------------
----------------------------------------------------------------------------------------------------------------------------------------------------------------------------------------------------------------------------------------------------------------------------------------------------------------------------------------------------------------------------------------------------------------------
==============================================================================================================================================================================================================================================================


NOTE - Please use the Loadouts in the Top Right to swap between the different versions of the build. This will swap your Items, Skills, Passive Tree & Configs around automatically.


Trade Links for everything can be found in their sections & at the bottom of the Earlygame section for Rare gear.


Earlygame - Mapping

Once you make it past Kitava in Act 10 there are a few things you will want to prioritize with the first being to get all of the Uniques that will quickly uplift our DPS and allow for a smooth progression to Tier 16.
Your main priority here will be to get Piscator's Vigil, Mind of the Council & Ephemeral Bond. If you did Heist all of this should be easy to afford with your budget and you can even grab the rest of the Uniques mentioned below as well.

Do your fourth Lab at ~Level 80-85 as soon as you have Piscator's Vigil, Mind of the Council & Ephemeral Bond.
For now, just pick up two small Mana Regen Passive Points. Later on we will swap to the Farrul Bloodline Ascendancy to do something more useful with them.

After that you should start working on getting yourself a 6-Link Body Armour along with the +1 Minimum Power Charge Rings & Malachai's Loop. (More on this below)

You should keep running the same 4-Link that you were using to level. Once you upgrade to a 6-Link that is when I would recommend to swap to the 6-Link in the Early Maps Power Siphon Skills setup.

Earlier in the guide I mentioned Kinetic Blast of Clustering which is the transfigured version of Kinetic Blast that loses its Additional Projectiles in favor of gaining Added Lightning Damage from your Mana.
This will be our Main Skill from now on which will be 4-Linked for clear while we will use Kinetic Fusillade in a 6-Link for Bosses.
Our first goal is to get to ~Level 80 with Power Siphon and then we will swap over to this with a somewhat large Passive Tree respec. I don't recommend to try doing this early as it will be quite scuffed.

As for your playstyle everything will stay the same up until Level 80. Once you have Ephemeral Bond and Mind of the Council, Anger will become useless and you should swap over to Purity of Elements. You should also make the swap from Elemental Weakness to Sniper's Mark.
When you are settled in and are good on Jeweller's and Fusing Orbs try to 4-Link Frenzy - Cast on Crit - Sniper's Mark - Ice Golem.
This will remove some buttons and will allow you to just press Sigil of Power when you get to a Boss, put down your Totems, then just spam Frenzy.

You will start encountering quite a bit of Corrupting Blood in Maps. To deal with it, you should get Corrupting Blood Immunity on your Flask. You can go to the Menagere and use the Blood Altar to craft the roll on a Life Flask with an Open Suffix.
You can find more info on this in the Life Flask Section below.

If you want an Atlas Tree to use as a starter tree to get you going and make you ~5-10 Divine Orbs while progressing to Tier 16 Maps, there is one below.
To find an explanation of the order in which you pick up nodes, you can watch the Chapter on it in my Day 2 PConc video from last season.
I plan to follow the same exact route this season and will discuss it in the first update video on this build but at least this way you can prepare for it ahead of time rather than having to wait a day.

Atlas Tree - https://tinyurl.com/Allie326ProgressionAtlas
Day 2 PConc Update Video - https://youtu.be/qL4WYtSdjJQ


Mapping Regex - "!gen|tal d|s rec|o al|son o"


Earlygame - Farming Kinetic Blast of Clustering


Getting Kinetic Blast of Clustering will be our first major goal so we can swap off of Power Siphon and Totems.
This section will discuss how to obtain it once you are ready to upgrade. You have 2 options:

1. You simply buy it on the Trade Website from someone else. This will cost ~10-20 Chaos Orbs in the first few days and will quickly crash from there.
2. You can run the third Lab until you obtain your own.

If you end up doing Heist and have ~150-200 Chaos, you should just buy it from someone else, as it will save you a significant amount of time.
If for some reason Clustering costs an absurd amount (+100 Chaos Orbs), you should still go and farm your own in Lab.
This is unlikely to happen but, keep it in mind as wasting 100 Chaos from Heist on Clustering is not worth it.

Trade Link - https://www.pathofexile.com/trade/search/Keepers/jW9kGL6kIX

If you are following this guide after the first few days of the season, I 100% recommend just buying Clustering from someone else. It is not worth the time to get it yourself given how cheap it should be by this point.

If you did not do Heist, you should go and obtain it manually in Lab.
To do so, you are simply just going to do what we were already doing in previous Lab Runs; Run Lab and check the Font at the end for a Kinetic Blast of Clustering.

With the third Lab in Act 10, you can now have the chance to see the Font option that "Changes a Skill Gem into its transfigured version" which will instantly convert a Kinetic Blast to Clustering.
This will take on average ~10-15 Lab Runs to get but it could take more or less based on your luck.

If you want to go get your own, you are likely to also make a decent profit doing so as most of the time you will simply be using the option to turn a Kinetic Blast into a random Blue Transfigured Gem.
Most seasons a lot of Blue Transfigured Gems are popular and are in high demand by other builds in the same way we are looking for Clustering.

This means that even if you do not get a Clustering from the random option, you could still get a gem worth 5-10 or more Chaos. You should use Awakened PoE Trade to price check them and see their values before picking.

Awakened PoE Trade Download Link - https://snosme.github.io/awakened-poe-trade/download
Some Blue Gems to be on the lookout for that are likely to be worth something are:

Spark of the Nova
Frostblink of Wintry Blast (This is always high value)
Holy Relic of Conviction
Flame Blast of Celerity
Penance Brand of Dissipation (This is always high value)
Vortex of Projection


----------------------------------------------------------------------------------------------------------------------------------------------------------------------------------------Step 2--------------------------------------------------------------------------------------------------------------------------------------------------

Earlygame - Swapping from Power Siphon to Kinetic Blast

Day 1 Update Video - https://youtu.be/uKbtIm8Tyis

Note - Fusillade is not in PoB yet.

Once you have gotten to ~Level 80, it is time to say goodbye to Power Siphon and hello to Kinetic Blast of Clustering and Kinetic Fusillade.
Kinetic Blast will be your main clear skill on a 4-Link while Kinetic Fusillade will be your Bossing skill on a 6-Link.

To make the swap happen, you MUST have Mind of the Council along with Ephemeral Bond or you will do no damage.
This is due to Kinetic Fusillade needing a lot of Added Damage to do anything which those two provide.
If you did Heist, you should easily be able to afford all of this and if not, keep playing Power Siphon until you can.

You also must have a Kinetic Blast of Clustering as you will need its Mana Scaling to do any damage.

The swap over should be simple, swap to Loadout in the Top-Right to Level 80 - KB Swap, and then just re-spec your Passive Tree as shown.
You should have a few Orbs of Regret from Heist to make this happen and if that isn't enough, you can use Gold to re-spec at Faustus in your Hideout.

You might need to re-color your 6-Link or to obtain a new one if you got a Corrupted one and got Power Siphon colors.
Please refer to the 6-Link section below for recoloring help.

Your playstyle will be fairly straightforward from here. Keep using Shield Charge and Frostblink to move, and put down Sigil of Power on Bosses.
For clearing, you will simply use Kinetic Blast for everything. It will feel a bit scuffed at first until you Anoint Split Shot on your Amulet which you should do ASAP. Once you've done so it should feel butter smooth.

For Bosses, you will simply use Kinetic Fusillade. This skill will generate Orbs which will launch after a short delay.
Kinetic Fusillade has a 12% More Damage multiplier for each Orb fired meaning the final one does 144% More Damage.
With Greater Volley and the +1 Projectile Wand Mastery, you will generate 6 Orbs every time meaning after two casts you get to the cap of 12. Fusillade has a 200% Attack Speed multiplier making this very quick.

After you get to 12 Orbs, simply... do nothing for .7 seconds while the Orbs fire, then go back to using two more casts of Kinetic Fusillade.
With Less Duration this will go down to .3 seconds making the whole playstyle snappier.
You can also use Kinetic Fusillade on Rares if needed but Kinetic Blast should destroy them especially if there are Walls or any other monsters nearby.
Some Bosses might also die quicker with Kinetic Blast due to this.

We will also be running a Spellslinger and Tornado setup which will cast Tornado every time you press Kinetic Blast or Fusillade.
This Tornado is VERY important to our build working correctly.
For Kinetic Blast of Clustering, we only shoot out one Projectile which would feel very bad to clear with. The Tornado will always spawn right in front of you and the Clustering will always hit it, causing it to instantly Fork and hit the whole screen.

For Kinetic Fusillade, it will end up being a Single Target DPS increase due to Fusillade's mechanics.
The Orbs from Fusillade come with +3 Chain and will do a small explosion on impact. With this, you can stand on top of a Boss, have the Tornado spawn on them, and then have Fusillade hit either the Tornado or the Boss and then Chain to the other.
This will basically double your DPS for free.


Earlygame - Uniques to Prioritize

There are some very powerful Uniques we can get our hands on that will make progression a lot faster.

Piscator's Vigil

Trade Link - https://www.pathofexile.com/trade/search/Keepers/EBo4boayT5

Piscator's will be our first purchase. This Wand is typically 5-10 Chaos and is... as good as most 5-10 Divine Wands.
This will be with you for a very long time and we will likely not bother to replace it until it's time to craft an Int Stacking Wand at a 50-100+ Divine budget.

If possible, you can try to find a Corrupted version after a day or two when they get cheaper.
Damage Penetrates x% Elemental Resistance and x% increased Attack Speed are both good options.


Mind of the Council

Trade Link - https://www.pathofexile.com/trade/search/Keepers/aLkrg5Q8fe

Mind of the Council will carry us through the Earlygame through its ability to slightly Mana Stack.

Added Damage is a very valuable source of DPS gain this early on which mostly gets taken care of by this.
You don't need to do anything different with this and it's simply meant to make use of the ~3k Mana you have by default.

This will be with us for a very long time as Kinetic Fusillade, our main Bossing skill, heavily favors Added Damage and without this we cannot scale that by much.
You will only be replacing Mind at a 100+ Divine budget when we swap to Int Stacking, if you can find a well-rolled one, that would be a good upgrade.


Ephemeral Bond

Trade Link - https://www.pathofexile.com/trade/search/Keepers/rPGyLm6gSQ

Ephemeral Bond will be another very strong Unique giving us Added Lightning Damage just like Mind of the Council.
Given we are stacking Minimum Power Charges that can never go away, the 90% Less Duration does nothing.

Just like Mind, this Amulet should only be 1-2 Chaos but if it ends up being very expensive you can directly upgrade to Atziri's Foible.

No matter what Amulet you get, you should try and buy an Opalescent, Indigo & Clear Oil to Anoint Split Shot onto it as soon as possible.
This is VERY important for Kinetic Blast of Clustering and will make a very big difference when it comes to clear.
Without this, your Clustering will shoot in a Y pattern which will feel clunky vs a W pattern with the third Fork.


Malachai's Loop

Trade Link - https://www.pathofexile.com/trade/search/Keepers/jW9kbJpRtX

After Piscator's, Mind & Ephemeral, Malachai's Loop is going to be your next Unique upgrade.
This Shield gives you % Spell Damage per Power Charge which Power Siphon, Kinetic Blast & Kinetic Fusillade directly converts into Attack Damage at a 150% ratio.

With the 5 Minimum Power Charges we have, (4 from Ascendancy and 1 from Instability + Disciple) this will beat any other Shield you can use for quite a while.
Malachai's also gives you another +2 Maximum Power Charges which we can take advantage of by getting the +1 Minimum Power Charge Suffix on both Rings.

The +1 Minimum Power Charge crafting recipe will be found within a Crimson Township Map by the Boss room.
As soon as you get it, you should try to craft this on both Rings or should upgrade to new Rings with Open Suffixes. (Trade Link below)

With this you will have 7 Minimum Power Charges and you never have to worry about the downside of being Shocked by the Shield.


Doedre's Tenure

Doedre's Trade Link - https://www.pathofexile.com/trade/search/Keepers/zb9V0p8qs4

For your Gloves, Doedre's Tenure will be an amazing Earlygame pair of Gloves offering Spell Damage which gets converted just like Malachai's Loop.
You can also opt to use a Rare pair of Gloves to get more Life and to fix any possible Attribute or Resistance issues at a slight DPS loss.

We will be replacing Doedre's Tenure very quickly when we swap to Kinetic Blast due to us wanting a pair of Gloves with the crafted "x% of Physical Damage Converted to Lightning Damage" mod.


Prismweave

Prismweave Trade Link - https://www.pathofexile.com/trade/search/Keepers/3qj2kEXgc5

Prismweave is a very strong Earlygame Belt giving you quite a lot of Added Damage. Early on we will not have a very large Mana Pool for Mind of the Council to do all the work so this will help a bit.
I would recommend to only use this until ~Tier 10 Maps but you could get to Tier 16 with this if needed. Once you are ready to upgrade, there is a Belt section below.


Earlygame - Rare Gear

6-Link Trade Link - https://www.pathofexile.com/trade/search/Keepers/LgBJqb6GSn
Boots Trade Link - https://www.pathofexile.com/trade/search/Keepers/2KnqP5ZoTk
Rings Trade Link - https://www.pathofexile.com/trade/search/Keepers/LgBKLQJBun
Belt Trade Link - https://www.pathofexile.com/trade/search/Keepers/8rlBqWGqiV

Given how many Unique items this build will be using to start, there are not many Rare items you need to look for.
Crafting is not very viable to do at this stage so we will simply hunt for gear from the Trade Website.

First, you will want to upgrade to a 6-Link as soon as you can. You can either buy a Corrupted 6-Link with the correct colors or you can buy an Uncorrupted one.
If you did grab an Uncorrupted one, you can use some Essences and recraft it with whatever you need such as using a Strength, Dexterity or a Chaos Resistance Essense.
If you have an Open Suffix, the "Regenerate 150 Energy Shield per second while a Rare or Unique Enemy is Nearby" is also a very nice added bit of sustain.

If you need to re-color your 6-Link, you should use this Calculator to figure out the easiest way.
Keep in mind that the Attribute Requirements are of the Body Armour's with NO Skills or Support Gems socketed in. Take those out first.

Vorici Calculator - https://siveran.github.io/calc.html

For Boots you are just going to look for a high Movement Speed roll along with any Resistances, Dexterity or Strength that you need. Ideally if you can get a Life or Mana roll on them that would be good too.
If you are good on Resistances, you can simply look for Chaos Resistance.

The Rings Trade Link will only show you Rings with 1 Open Suffix in order to allow you to craft +1 Minimum Power Charges as soon as you unlock the recipe.
Otherwise, you will just be looking for the same priority as Boots; Resistances & Attributes. If you have the budget for it, Added Lightning Damage to Attacks would also be a small DPS boost.

Your Belt will be the same thing and if you can ideally find one with an Open Prefix to craft x% increased Elemental Damage with Attack Skills that would be good.


Earlygame - Resistance Capping

Your Resistances in this build will be very simple to deal with. With Holy Dominion, Alira and Cruel Preparation, quite a lot of them are taken care of for you.
You can also pick up the Jewel Socket by Mind over Matter for one Passive Point to help if needed.

Between all of this you will need very few actual rolls on your gear. Ideally two Elemental Resistance rolls on your Rings and some medium rolls on your Belt should be enough to cap you.
This is even easier if you pick up a Socket and Practical. This means you will have a lot of space to try and fit in Chaos Resistance.

The sample gear uses two Amethyst Rings which can easily be swapped to Two-Stone Rings if needed.

Keep in mind that you do not need the same rolls as the sample gear. Fit everything as needed based on your gear.


Earlygame - Attribute Requirements

Attribute Requirements will be a bit more difficult to deal with than your Resistances were.

In total, you will need one Mid-Tier Strength and three Mid-Tier Dexterity rolls to deal with everything.
It is up to you where you put these rolls and you do not need to get them on the same slots as the sample gear.

Some things that could help if you are struggling, you can path over to the +30 Dexterity node by Elemental Overload.
The EO +30 Dex node is not very efficient to get to but its there if absolutely needed.

You can also pick up the Jewel Socket by Mind over Matter which can be filled with a Dexterity Jewel if needed.
This can also be done to your Abyss Jewel in your Stygian Vise if you are using one.

The high Dex requirement is going to stem from Sniper's Mark with it costing 155 Dex at Level 20.
Your next highest is your other Green Supports at 111 Dex. This means if you absolutely need to, you can simply de-level your Spiner's Mark with an Orb of Scouring to make it fit with your current Dexterity.

Your Strength shares the same story with your supports requiring 111 Strength. Any additional Strength past that is simply to keep leveling Shield Charge & Steelskin.
This will gain you a small increase to your Movement Speed but can easily also be de-leveled as needed.


Earlygame - Flasks

Utility Flask Trade Link - https://www.pathofexile.com/trade/search/Keepers/2Kn92rjpSk

Flasks are going to be pretty simple to start with. You want to keep a Life & Mana Flask up until we swap to Chaos Inoculation in the Midgame.
Your Mana Flask isn't there for the sake of spell casting but, it is there as a second Life Flask to recover your Mana for Mind over Matter.

On both your Life & Mana Flasks you ideally want to use a few Orbs of Alteration in hopes to hit the "Instant Recovery on Low Life" and "Increased Amount Recovered, Reduced Recovery Rate" rolls respectively.
You want to try and roll these mods with no Suffix on the Flask as that will let you add a guaranteed Immunity Suffix in the Menagere.

Once you have your Flask setup, head over there and put the "Immunity to Bleed" roll on your Life Flask as this will deal with Corrupting Blood in Maps and the "Immunity to Poison" roll on your Mana Flask.

For your other three Flasks, we will simply want to use a Quicksilver, Jade & Quartz Flask.
Quicksilver is required in every build, Jade will give you a small defensive layer with ~30% Evade Chance while Quartz will give you Phasing allowing you to move through enemies.

Eventually, once you swap to Mana Stacking, you will want to replace your Quartz/Jade Flask for a Diamond Flask as you will need it to reach 100% Crit Chance.

On all three Utility Flasks you are aiming to get "x% increased Charge Recovery" along with Movement Speed, Increased Evasion and Chance to Avoid Being Stunned.
The Suffixes can be on any of the three and their exact placement is not important.

Make sure to take these over to the Crafting Bench and to use the "Used when Charges reach Full" to automate them.

The Trade Link above has all three Suffixes in a Count filter.
Simply type the Flask name at the top and buy one with one of the Suffixes.
Then, go and turn off that Suffix from the Filter and search for a different Flask type until you have all three with all three Suffixes.


Earlygame - Grafts

Heart of Flame Graft - https://www.pathofexile.com/trade/search/Keepers/9zdDaRZzTK
Overcharged Sinews Graft - https://www.pathofexile.com/trade/search/Keepers/V5lgV92ohp
Call the Pyre Graft - https://www.pathofexile.com/trade/search/Keepers/Yp9o6nObiY

New to 3.27 are Grafts from Breach which offer you new Skills and Passives to help you out and we have 3 specific Grafts that are interesting to us.
It is up to you to choose which two you want to use and they all have their own use cases.

The three skills are: Heart of Flame, Overcharged Sinews & Call the Pyre

Heart of Flame will give you a defensive similar to Molten Shell every 20 seconds if you are missing Life. This feels quite strong as a defensive layer and I highly recommend always running this.
You can also get CDR as a Suffix on this making this have even better uptime.

Overcharged Sinews will build up Jolt stacks on you making you take 1% More Damage per stack while also gaining you 2% More Maximum Attack Damage.
This is worthwhile to use if you are ok being a bit squishier but in Tier 16 Maps this might kill you often. There is an amazing Suffix on this giving you up to 6% increased Critical Chance per stack that makes this a very large DPS increase.

Call the Pyre simply spawns Fire Tornadoes every time you attack, dealing some very decent damage. These Tornadoes can overlap hitting Bosses multiple times which makes it feel quite strong.
This will fall off in higher end content and become useless but until then its pretty good.


----------------------------------------------------------------------------------------------------------------------------------------------------------------------------------------Steps 3, 4 & 5--------------------------------------------------------------------------------------------------------------------------------------------------

Earlygame - Swapping to Mana Stacking


The final major change to make in our build for the Earlygame is to swap over to Mana Stacking. While you had some Mana before, we want to start focusing on this a lot more.
This is to capitalize on the Mana Scaling from Kinetic Blast of Clustering and Mind of the Council.

This should be the final thing you do once you have gotten to Tier 16 Maps, have all previous items mentioned, and have a 6-Link along with good gear in every slot.
This swap will happen in 3 Steps.


Step 1 - Swapping from Fusillade to Kinetic Blast


Atziri's Foible Trade Link - https://www.pathofexile.com/trade/search/Keepers/aLkrmkzRSe
Atziri's Promise Trade Link - https://www.pathofexile.com/trade/search/Keepers/Z6KZrakztQ
Rare Gloves Trade Link - https://www.pathofexile.com/trade/search/Keepers/EBodRV5yS5

At this point, it is time to drop Kinetic Fusillade and to swap over to a 6-Link Kinetic Blast. While Fusillade was great for Tier 1-16 Maps, it falls off now due to it only being able to scale from Mind of the Council which is not enough.
A 4-Link Clustering was already somewhat keeping up at ~3-4k Mana and this will further swing this in its favor.

First, purchase Atziri's Foible and Anoint it with Split Shot just like you did with Ephemeral Bond. You should also Quality this to 20% using Fertile Catalyst.
With this, you can swap your tree to Level 95 - Mana Step 1. While this tree is basically the same as the Level 90 Tree, this is mostly here to make sure your Passive Tree looks correct.

With Foible, you should now be able to swap over to a 6-Link Kinetic Blast setup as shown in the Mana Steps 1-3 Skills Section.
To go along with this, you will put Wall of Force along with Second Wind - Trap Support - Advanced Traps in the newly freed up 4-Link you had Kinetic Blast in.

Wall of Force will allow you to spawn a Wall that Kinetic Blast can hit, giving you more DPS against Bosses. It is hard to tell the exact gain from this, but it is ~20-40% based on how they spawn while they are active.
We will be turning them into a Trap as this allows us to use Advanced Traps for a very large CDR reduction giving you more total Walls.

Simply press Wall of Force anywhere close to a Boss and after a second, your DPS will go up. With Second Wind you can throw down two at once for more burst DPS and otherwise you should just use it on cooldown when fighting Bosses.

At this point it is also time to say goodbye to Doedre's Tenure in favor of Rare Gloves. With us fully relying on Kinetic Blast for everything, we need to make it do as much DPS as possible.
One important aspect of this requires us to 100% convert all of the Added Physical Clustering gains from Mana over to Lightning to fully utilize all of our scaling.
For now you just had 40% from the Lightning Mastery and we will be gaining another 50% from us running Physical to Lightning. To get the last 10% we will need a "x% of Physical Damage Converted to Lightning Damage" Prefix on our Gloves.

This is also a good excuse to grab some extra useful stats as Doedre's really isn't doing much anymore. The Trade Link above is for Gloves with an Open Prefix to put the craft along with Mana and Attack Speed.
You are also free to try and look for Life or Chaos Resistance if you want to be tankier or Intelligence if you want more Damage. Once you buy a pair, go to the Crafting Bench and craft on the conversion mod.

Replace your Jade or Quartz Flask with a Diamond Flask that has the "x% increased Critical Strike Chance during Effect" Suffix on it.

You should aldo replace your Mana Flask with Atziri's Promise. You don't ever really need it anymore and the Immunity to Poison isn't going to do much for longer.
Atziri's Promise gives you Chaos Damage from your Physical and Elemental damage which Kinetic Blast does.
Clustering gives you Added Physical based on your Mana and we then convert it to Lightning through the Lightning Mastery & your Gloves. Atziri's will give you Chaos Damage from both parts, double dipping through conversion making this very solid.
We also don't have enough Chaos Resistance yet so this will help with that.


Step 2 - Cluster Jewels, Shield, Farrul Bloodline & Foulborn Kikazaru


Rare Shield Trade Link - https://www.pathofexile.com/trade/search/Keepers/6zoDbYBkIG
Foulborn Kikazaru Trade Link - https://www.pathofexile.com/trade/search/Keepers/KlY8OO0Rc5
Farric Tiger Alpha Trade Link - https://www.pathofexile.com/trade/search/Keepers/8rl5gLgZIV

Now, it's time to make some semi-expensive upgrades that will increase your DPS by ~50% and, it's time for some crafting.

First, you will be looking to swap from Malachai's Loop over to a Rare Shield with Mana and other useful stats.
We are very quickly going to decouple the build from Power Charges and it is time for this Shield to go.

These will be quite cheap so you can look for a fairly nice one with x% Spell Damage or a big Life roll.
If you can grab one with any other useful stats, that is great. If you find one with an Open Prefix, the best DPS mod to craft is "Gain x% of Lightning Damage as Extra Chaos Damage."

One of your +1 Minimum Power Charge crafts on your Rings will now be useless, you are free to swap this out. If you don't need anything specific Attack Speed is your best DPS suffix while generic x% increased Elemental Damage with Attacks is your best Prefix.
You still need to keep one as we have Instability and need to get +5 Minimum.
You can also look to replace one ring with a Foulborn Kikazaru that offers +2 Mana Per Level. These Rings are very powerful and will be with us for a very long time until we craft Heist Rings in the Midgame.
In Step 3 of this swap we will be removing Instability and you can look to buy a second one then as well. Fitting these in might be a bit difficult due to them having no Resistances. It is well worth it to try and fit them if you can and just running one shouldn't be too difficult.

You now want to go and get your Bloodline Ascendancy, Farrul. This will give us a useful 4th node with Huntleader giving us Spectral Tigers.
These Tigers will give you a buff for a total of 35% increased Attack Speed and 125% increased Critical Strike Chance.

To obtain it, you simply need to defeat Farrul in his lair which is a relatively simple fight to do.
In order to fight them, you will need to buy a Farric Tiger Alpha, go to your Menagere and defeat it, then go through the portals into the Farrul fight.
Just make sure to dodge the Stampede attack and the rest of the fight should be simple. Once defeated there will be an Altar in the room that will give you the Ascendancy.

We will be looking to upgrade over to a Cluster Jewel setup with one Large Cluster Jewel and two Medium Cluster Jewels.
Given all of these are fairly easy to make, we will be crafting them ourselves, lets start with the Large Cluster Jewel first.

This will be a Cluster with both Scintillating Idea and Storm Drinker on it.
These are very strong Nodes and will be with us for quite a while. We are not going to aim for a third Notable on the Suffixes as it will be an expensive minor upgrade.


Large Cluster Jewel Crafting Guide


Buy an Item Level 67 or lower Lightning Damage Large Cluster Jewel that has 8 Added Passive Skills. You can also settle for 9 if 8 is too much.

Cluster Jewel Base Trade Link - https://www.pathofexile.com/trade/search/Keepers/KlY85pVLc5

1. Buy ~2150 Primal Crystallised Lifeforce from the Auction House. This is the average amount needed and you might need more or less based on luck.

2. Go to the Harvest Crafting Bench and use the "Reforge a Rare Item... including a Lightning modifier" option on the Cluster Jewel until you get Scintillating Idea and Storm Drinker, this is a ~1/43 chance.

3. If you have Open Suffixes, you can use Exalted Orbs to add extra stats onto it.


From here, you can swap to the Level 95 - Mana Step 2 Passive Tree and socket in the Cluster Jewel.
After that, we will be crafting two of the same Medium Cluster Jewels to go into the sockets of the Large Cluster Jewel.
This will be a Projectile Medium Cluster Jewel with Eye to Eye and Repeater.


Projectile Medium Cluster Jewel Crafting Guide


Do this craft two times.
Buy an Item Level 67 or lower Projectile Damage Medium Cluster Jewel with either 4 or 5 Added Passive Skills.

Cluster Jewel Base Trade Link - https://www.pathofexile.com/trade/search/Keepers/54DE2vjCa

1. Buy ~500 Wild Crystallised Lifeforce from the Auction House. This is the average amount needed and you might need more or less based on luck.

3. Go to the Harvest Crafting Bench and use the "Reforge a Rare Item... including an Attack modifier" option on the Cluster Jewel until you get Eye to Eye and Repeater, this is a ~1/10 chance.

4. If you have Open Suffixes, you can use Exalted Orbs to add extra stats onto it.


Jewel Trade Link - https://www.pathofexile.com/trade/search/Keepers/LgBJrR6jFn

You can now socket both of these into your Large Cluster Jewel, grab yourself three Jewels with % Increased Life and Mana and you are done with Step 2.
You can look for Crit Multi, Dex, Strength or any other stats needed on these Jewels as well. The Trade Link above will have DPS rolls set on a count.


Step 3 - The Damage


Healthy Mind Trade Link - https://www.pathofexile.com/trade/search/Keepers/QL3ZPllwuw
Light of Meaning Trade Link - https://www.pathofexile.com/trade/search/Keepers/3qj2r5lJS5
Unnatural Instinct Trade Link - https://www.pathofexile.com/trade/search/Keepers/Z6KmgPg0SQ

The final step to fully swapping to Mana Stacking is to purchase three expensive but very powerful Unique Jewels while also crafting a better pair of Gloves.

Most of our damage is Lightning and Kinetic Blast of Clustering gives us a % of our Mana Pool as Added Physical Damage which we need to convert over to Lightning.
40% of this is being taken care of by the Lightning Mastery and previously, you had a 25% roll crafted on your Gloves and another 50% from Physical to Lightning fully converting you.
We are now going to get another 20% as an Eldritch Implicit while crafting a better pair of Gloves. This will let you drop Physical to Lightning in favor of Awakened Lightning Penetration.


Glove Crafting Guide


First, buy an Item Level 82 Energy Shield Base pair of Gloves with Fractured Mana on them, ideally Warlock Gloves.

You can use Hybrid Bases as well as long as it has Intelligence.
You can buy something higher than Item Level 82 but 82 will be the easiest to craft. (This is a very very minor difference)

Glove Base Trade Link - https://www.pathofexile.com/trade/search/Keepers/G6lnwyKZIb

1. Use either Deafening Essences of Zeal or Spite to guarantee Attack Speed or Intelligence until you get the other at a Tier 2 or higher roll.
You can use Shrieking Essences if Deafening is too expensive. It is a ~1/46 chance to get Tier 2 Intelligence with Zeal and a ~1/80 chance to get Tier 2 Attack Speed with Spite.

2. Once you have a pair of gloves with Fractured Mana, Attack Speed and Intelligence, craft the "x% of Physical Damage Converted to Lightning Damage" Prefix on an Open Prefix.
If you do not have an Open Prefix, use any Eldritch Ember on it to influence it with the Searing Exarch, then use an Eldritch Orb of Annulment to only remove a Prefix.

3. You can use Exalted Orbs on the Gloves to fill in any Open Affixes.

4. Use Grand Eldritch Ichors until you get the "20% of Physical Damage Converted to Lightning Damage" Eater of Worlds Implicit.
This will be quite expensive to do and you can use lower tiers of Ichors if needed, the higher this roll the better.

Use Lesser Eldritch Embers until you get the "Gain 1 Rage on Attack Hit" Searing Exarch Implicit. You do not need to use anything better than Lesser Embers for this.

You can now swap out Physical to Lightning to Awakened Lightning Penetration, this will be a lot more Boss DPS while also giving you Lightning Exposure for extra DPS while Mapping.


As for Jewels, your first priority will be to buy either Healthy Mind or Light of Meaning based on which one is cheaper.

Healthy Mind will turn the Life from the Cruel Preparation wheel into Mana while also having its own x% increased Maximum Mana roll.
A high-rolled Healthy Mind is likely very expensive so you should just settle for whatever makes sense for your budget.

A Light of Meaning adds additional stats to all Small Passive Points within its radius and we are looking to get one that gives everything +5 Mana.
This will be socketed above Iron Will near the Scion start.

Both of these Jewels are as good as each other when it comes to upgrades and their price is all that matters.

Once you have bought both, your last upgrade is to buy an Unnatural Instinct that will go in the bottom Scion socket.
This will "give" you every Small Passive Point within its circle that is not picked up offering some Resistances, Movement Speed and Totem Attack Speed.
Most importantly, every node within the radius of both Light of Meaning and Unnatural Instinct will benefit from Light of Meaning giving you ~420 Mana.

This will be quite expensive but will also be the final upgrade of this setup.


Earlygame to Midgame Transition


You should now have a setup capable of farming any strat you wish to do. You should feel tanky, have good recovery, and strong clear.
Our next goal is to get ready to swap over to Int Stacking which will be the final form of the build that will take... Mirrors to finish.

This will be somewhat expensive to do, we need at least 1000 Intelligence or more to make this reasonable and will be the final thing to do in the Midgame before we enter the Endgame.
This means we have to start farming more currency!

Luckily with Kinetic Blast of Clustering, this should be simple to do and you are free to do anything you wish such as Harvest, Essences, Guardians, Expedition and even Legion.

The Midgame will start off with some important upgrades with a focus on Defences to make whatever you want to do even comfier before swapping to Int Stacking.

For now, the Earlygame is finished.


==============================================================================================================================================================================================================================================================
----------------------------------------------------------------------------------------------------------------------------------------------------------------------------------------------------------------------------------------------------------------------------------------------------------------------------------------------------------------------------------------------------------------------
----------------------------------------------------------------------------------------------------------------------------------------------------------------------------------------------------------------------------------------------------------------------------------------------------------------------------------------------------------------------------------------------------------------------

----------------------------------------------------------------------------------------------------------------------------------------------------------------------------------------Midgame-------------------------------------------------------------------------------------------------------------------------------------------------------------------------------------------------------------------

----------------------------------------------------------------------------------------------------------------------------------------------------------------------------------------------------------------------------------------------------------------------------------------------------------------------------------------------------------------------------------------------------------------------
----------------------------------------------------------------------------------------------------------------------------------------------------------------------------------------------------------------------------------------------------------------------------------------------------------------------------------------------------------------------------------------------------------------------
==============================================================================================================================================================================================================================================================


The Midgame will focus heavily on making you as tanky as possible. The ultimate Endgame of this build will be to become an Int Stacker which this will slowly walk you towards with the final step being crafting an Int Stacking Wand to begin Endgame.
At this point, you have more than enough DPS for everything including reasonably doing Tier 17 Maps, but you won't be able to live.

To fix this, we will be swapping over to Chaos Inoculation which will make us Immune to Chaos Damage. That on it's own will help greatly as there is... a lot of Chaos Damage in PoE.
This will cause us to become a full blown Energy Shield build and with this, we can pick up Ghost Reaver along with the Instant Leech Mastery and suddenly have amazing recovery.

With us swapping over, we want to reserve all of our Mana as Mind over Matter is now useless allowing us to fit in Grace. This along with a Jade Flask should put you at ~60% Evasion when combined with the Evasion/Energy Shield Mastery at Soul Thief.
Going from the ~35% Evasion you previously had to ~60% will almost half the amount of Attacks that land, basically doubling your perceived tankiness against most enemies.

You will still randomly get 1-Shot, that's just PoE, but with 11k Energy Shield that will happen less often. This is only going to get better and better from here and we will hit some truly disgusting EHP numbers moving forward.


----------------------------------------------------------------------------------------------------------------------------------------------------------------------------------------Step 6--------------------------------------------------------------------------------------------------------------------------------------------------

Midgame - Crafting A New Wand

Genesis Tree Setup - https://youtu.be/SSgR7C28cLI

It's time to replace Piscator's Vigil now that we have more currency to work with.
We are going to craft our own Wand that should end up being ~20-30% better than Piscator's based on how much you spend on it.
This should cost anywhere between 5-10 Divine Orbs based on luck and what rolls you end up going for.

One other option is to use the Genesis Tree in the video above to attempt to get your own Wand base for this craft.
While this is a bit unlikely to happen, this is something that is passive and is also a great money maker given there are quite a few different Fractured Wand bases that are valuable to other builds.


Wand Crafting Guide


First, buy an Item Level 81 or higher Kinetic Wand with Fractured Attack Speed.
You should look for a Fracture close to 19% as you can afford.

Wand Base Trade Link - https://www.pathofexile.com/trade/search/Keepers/2KnzGvrYTk

1. Use Deafening Essences of Woe to guarantee Spell Damage until you hit Tier 4 or higher Mana.
You can use Shrieking Essences to make this cheaper if needed. You can also go for a higher Tier of Mana but it will be a lot more expensive.

The Mana Tier will not make that big of a difference as a DPS gain, it is ~1.3% More DPS to hit Tier 1 over Tier 4. I would personally recommend to use Deafening to hit Tier 4 rather than Shrieking to hit Tier 1 or 2.
It is a ~1/12 chance to hit Tier 4 Mana, a ~1/19 for Tier 3, a ~1/34 for Tier 2 and a ~1/84 for Tier 1. Please read Step 2 before deciding what you go for.

2. Your goal is to get a Wand with no other Prefix on it other than the Essence Spell Damage and Mana rolls along with at least one Open Suffix. It is completely fine if there is some other junk Suffix along with the Fractured Attack Speed as long as one Suffix is Open.

If your Wand has any other Prefix on it you must use an Orb of Annulment to attempt to remove it. If it removes the Spell Damage or Mana roll go back to Step 1.
If your Wand has no Open Suffix, you must use an Orb of Annulment to attempt to remove at least one. If it removes the Spell Damage or Mana roll go back to Step 1.


3. If your Wand still has a second Suffix on it AND it has the Open Prefix as required, go to the Crafting Bench and craft "Prefixes Cannot be Changed" then use an Orb of Scouring to remove the Non-Fractured Suffix.
You should now have a Wand with three mods on it: Essence Spell Damage, Mana and Fractured Attack Speed.

4. Go to the Crafting Bench and craft "Can have up to 3 Crafted Modifiers" then craft "Attacks with this Weapon Penetrate x% Elemental Resistances" and the Hybrid "+X to Strength and Intelligence, X% increased Critical Strike Chance" mods.

5. Quality the Wand to 20%, then with 5000 Primal Crystallised Lifeforce, go to the Harvest Bench and craft the "Quality does not increase Physical Damage, 1% increased Critical Strike Chance per 4% Quality" Enchant.

You will now have a completed Wand.


Midgame - Swapping to Chaos Inoculation

Ok, this is going to be a big one so stick with me here. We are now going to get ready to make the swap from a Life/Mana build with MoM to a full Energy Shield build with Chaos Inoculation.
This will be the first major step towards everything else we want to do with this build and its about to make you absurdly tanky very fast.

To make this happen, we just need to get a bit of gear and then just swap our Passive Tree over to the CI Swap one and that's it.
Please read this whole section and make sure you have everything here before swapping, do not swap until I specifically tell you to further down. You can potentially brick yourself and have to swap back to Life.

The core components here are going to be a new Body Armour and Boots with high Energy Shield, a new Helmet and a new Ring & Belt as you will likely need help with Resistances and Dexterity.
If you did not craft the Wand from above, you should do that first. This is going to be a "scuffed" swap where we will be slightly weaker than the previous swap so that Wand will help offset the initial loss.
At this point you are doing so much DPS that this isn't a big concern and the massive gains in EHP are highly worth it.

Once you swap, this will be your new Map Regex - "!efl|eec|gen|s rec|o al"


New Helmet


Mindspiral Trade Link - https://www.pathofexile.com/trade/search/Keepers/G6lLwBvOUb

For this swap we are finally going to let go of Mind of the Council in favor of Mindspiral which will give you significantly more Energy Shield.
This is a pure DPS loss but given how much Mana we have, this Helmet is too good to pass up on.

You should ideally buy one with the "Socketed Skill Gems get a 90% Cost & Reservation Multiplier" Corruption Implicit on it.
After the swap we want to add in a Grace for even more Evasion Rating and this will allow you to do that. Without this you will need to buy a Level 3 Enlighten which is significantly more expensive.

For now.. put this in your stash as it's currently useless.


New Body Armour


Body Armour Trade Link - https://www.pathofexile.com/trade/search/Keepers/bGkWo552iL
Craicic Sand Spitter Trade Link - https://www.pathofexile.com/trade/search/Keepers
Black Morrigan Trade Link - https://www.pathofexile.com/trade/search/Keepers/eRGyEMG6cL

We are going to be looking for a pure Energy Shield Body Armour with at least ~1k Energy Shield or more.
The Trade Link above is set to show you that BUT you MUST NOT buy one that has a Fractured Suffix. We need all 3 Open Suffixes and we cannot remove that, any Fractured Prefix is completely fine.

Purchase whatever looks reasonable to you while ignoring any of the Suffixes as we will get rid of all of them. Simply look at the Energy Shield number in the Bottom-Right as that is what the Body Armour would have if it was Qualitied to 20%.

Once you buy one, use an Eater of Worlds Ichor on it to influence it then use an Eldritch Orb of Annulment until you remove all Suffixes.
If your Body Armour came influenced with both Searing Exarch and Eater of Worlds, make sure you use an Ichor thats big enough to make Eater dominant so the Eldritch Orb of Annulment doesn't remove a Prefix.

After you have cleaned off all Suffixes, take it to the Crafting Bench and craft "Can have up to 3 Crafted Modifiers" followed by "6% increased Attributes" and the Hybrid "+x to Dexterity and Intelligence" mods.
The Dexterity roll is going to be crucial to us getting enough Dexterity.

You will also need to 6-Link it and the cheapest option for that is to use a Craicic Sand Spitter & Black Morrigan in the Menagere.
Make sure your Body Armour has 6-Sockets first.
Simply buy both, add them to your Menagere just like you did for Farrul, then do the Altar recipie with your Body Armour in there. Make sure you pick the correct one that will set it to Maximum Links that requires both beasts.

Lastly, we need to roll the Eldritch Implicits on it. Use Lesser Eater of Worlds Ichors until you hit "10% of Physical Damage from Hits taken as Chaos Damage." Given we will be Immune to Chaos Damage, this just wipes away 10% of all Physical Damage you will ever take.
With Searing Exarch Embers, roll for the "+x% to Critical Strike Chance Multiplier for Attack Damage" Implicit. It is up to you if you wish to use higher tiers of Embers.

Make sure your Body Armour has 20% Quality.

Once this is done... put the Body Armour in your stash as its not usable yet.


New Boots


Boots Trade Link - https://www.pathofexile.com/trade/search/Keepers/zb9EGyZKh4

Just like with the Body Armour, we are looking for new pure Energy Shield Boots.
You ideally want to find a pair with an Open Prefix to craft the Hybrid "x% increased Movement Speed, x% chance to gain Onslaught for 4 seconds on Kill" mod which will give us access to Onslaught while Mapping.

Outside of that, you just want to make sure they have an Intelligence roll on them and as much Energy Shield as possible.
The Trade Link is also looking for at least one high tier Resistance roll as you will likely need it. You are free to adjust the Trade Filter to look for two or to look for lower Energy Shield Boots if needed.

Remember you can always use the Harvest Bench to shuffle Resistances around so all that matters is the Tier of it, not the type of Resistance they give.

For Eldritch Implicits, use Eater of Worlds Ichors until you get "Gain x% of Physical Damage as Extra Cold Damage." While Extra Lightning Damage would be more DPS, this gives you the ability to Chill and Freeze enemies which is a great defensive layer.
You can use any tier of Ichors that you can afford for this, a bigger roll is always good.

Use Lesser or Grand Searing Exarch Embers until you get "x% increased Action Speed." This is simply a Multiplier to your Attack Speed and Movement Speed that feels very good.
There is no difference between Lesser and Greater so its either Lesser for 4% or Grand for 5%.


New Ring, Belt & Jewels


Ring Trade Link - https://www.pathofexile.com/trade/search/Keepers/veZpRv3ZTE
Belt Trade Link - https://www.pathofexile.com/trade/search/Keepers/OgLq5mwVhE

PLEASE READ THIS SECTION.

At this point, we will need to give up one Foulborn Kikazaru for a normal Rare Ring as we simply need help with Resistances.
You are likely going to want to replace your Belt as well given it probably has Life on it which is now going to be useless.

You will need one high tier Dexterity roll somewhere to make this work. This can either be on your Ring or Belt, but one of them basically needs to have ~40+ Dexterity.
You can also get Dexterity on your Abyss Jewel and normal Jewels if needed.

You will also need a tiny amount of Strength for Shield Charge and Steelskin. You can also choose to just De-Level them down to ~16-17 to make this swap easier.

The Belt and Rings should be bought at the end after you have a Body Armour and pair of Boots.

What I recommend doing is to remove your Body Armour, Boots, one Kikazaru, Belt & Cluster Jewels off of your character.
Then, put on the new Body Armour and Boots to see how many more Resistances and Attributes you need. You can then use that info to find yourself a good Ring and Belt.

Remember to also Quality your Purity of Elements to 20% for an extra 5% Resistances.

The Trade Filters will just be looking for as many Resistances as possible along with other useful stats. Both of them will have Dexterity as a filter, you should turn that off on the second item you buy as you don't need it on both.
Both Trade Filters will also tell you the Total Resistance that an item has in Grey Text below the actual stats. You can click on this to filter by it, making everything with the most Resistance to show up at the top.

Remember you can always use the Harvest Bench to shuffle Resistances around so all that matters is the Tier of it, not the type of Resistance they give.


Fully Swapping to Chaos Inoculation


With a new Helmet, Body Armour, Boots, Ring & Belt bought, it's time to swap to Chaos Inoculation.
Before swapping, put everything on and make sure you are Resistance Capped with Purity of Elements on.

Make sure you also have enough Attributes, you will lose 20 Strength and 10 Dexterity from the Passive Tree.
Remember, we are removing our Cluster Jewels here, so make sure they weren't helping here with Resistance or Attributes.

If everything looks good, it's time to swap your Passive Tree over to the CI Swap one.
If something somehow went wrong, try to grab a new Abyss Jewel or normal Jewels to try and fix it.

You should have ~8-9k Energy Shield after swapping with all Auras turned on.

You now do not care about your Mana being unreserved as we are not playing Mind over Matter anymore and want to get rid of all of it to gain Energy Shield from Mindspiral.

You will now want to add in a Precision, Clarity & Grace as new Auras. These should all go into your Helmet with Purity of Elements to benefit from the Mindspiral Corruption.
If you did not get a Corrupted Mindspiral, you will have to get a Level 3 Enlighten linked to Purity of Elements, Grace & Precision. You will then need to move Clarity to your Wall of Force 4-Link with you removing Second Wind.
Please do not buy an Enlighten, you should go get the Corruption Implicit.

You should level Precision all the way to Level 20 and then level Clarity up to ~Level 11. The goal is to have ~120 Mana unreserved to make sure you can always use Kinetic Blast three times in a row before going OOM.
All of our Mana is going to come from raw Mana Regen so this should never happen, but its better to be safe.

You should also swap from Steelskin and Automation to Immortal Call and Cast when Damage Taken. Leave Immortal Call at Level 3 and Cast when Damage Taken at Level 1.

With all of this, you are now fully swapped over and should feel a lot tankier! Your Energy Shield will never go up unless you are hitting something which will eventually be fixed later on but for now will be a feature of the build.
This should be 100% fine for basically all content you want to do and I just would recommend not fighting Bosses with long Immunity Phases such as Maven or Sirus for now.
For all Mapping this should be fine with the exception of Burning Ground potentially feeling bad which can just be filtered out.

You should now be ready for Tier 17 Maps as well. You will likely not be able to kill the Boss with most map mods but, you can somewhat comfortably clear the Maps for whatever Tier 17 strat you want to do.
For anything Tier 16 you want to do, you will find it VERY hard to actually die and it's only going to get tankier from here.


----------------------------------------------------------------------------------------------------------------------------------------------------------------------------------------Step 7--------------------------------------------------------------------------------------------------------------------------------------------------

Midgame - Watcher's Eye

Watcher's Eye Trade Link - https://www.pathofexile.com/trade/search/Keepers/aLkrJjg8He

You now also want to be looking to get a Watcher's Eye with the "Gain x% of Maximum Mana as Extra Maximum Energy Shield while affected by Clarity" mod.
This will give us a very large amount of Energy Shield which makes you tankier.

This mod is quite expensive on its own so we will not be looking for a second Watcher's Mod at this point.
You do not need to grab this before swapping to Chaos Inoculation but it should be your first upgrade after doing so.


Midgame - Runegraft of Refraction

There is no Trade Link, you buy this Runegraft from the Currency Exchange.
Awakened Elemental Damage Trade Link - https://www.pathofexile.com/trade/search/Keepers/02nLqlreFg

As for the final Post-Swap upgrade, you will add in a Runegraft of Refraction. This will go onto a Mastery and replace it with a free Fork and +1 Chain.
This then allows you to remove Fork from your 6-Link giving you a big DPS increase with Awakened Elemental Damage with Attacks. You can use normal Ele Damage, but you should be looking to upgrade when you can.

I recommend to put this on the Mana Mastery at Prodigal Perfection as we will always have that long term and if you put it on a different Mastery you might have to buy a new one in the future.
This is just a simple ~30% More Damage and the +1 Chain is also useful at giving you slightly better clearing overall.


Midgame Step 1 - Big Upgrades


Just like how the Earlygame had the Mana Swap Steps 1, 2 and 3, so will the Midgame being split into two sections, Big Upgrades and Farming Time.
There are Loadouts for this in the Top-Right which are a culmination of everything in those sections.

The first Step, Big Upgrades will focus on well... big upgrades that are somewhat expensive but very powerful.
By now you are able to do Tier 17 Maps somewhat comfortably and with everything in this section you should be able to handle Tier 17 with no problem.
This will also likely allow you to somewhat handle Uber Bosses too but that is going to come down to personal skill.


Midgame - Eyes of the Greatwolf Talisman

Greatwolf Trade Link - https://www.pathofexile.com/trade/search/Keepers/5n4R8rqeCa

It's time to finally replace Atziri's Foible with something much better.
Eyes of the Greatwolf is an Amulet that only comes with Corrupted Implicits on it from the Talisman Pool which are doubled in strength.

With this, we can go find a Greatwolf that has anywhere between 40-60% Maximum Mana on it which on it's own beats out Foible.
As for a second mod, you ideally would want to buy one with "Phys as Extra of a Random Element" as your highest DPS option.

The Trade Filter will also show you Greatwolfs with Spell Damage and Physical Damage which are very close to Phys as Extra if they are well rolled.
It will also include Physical Damage Reduction and Global Defences if you wish to grab something to make you tankier instead. These are turned off and you just need to turn them on if you want a defensive one.

Keep in mind that this will likely require you to need extra Attributes as Foible did reduce all requirements by 25%.
If you are struggling with this, it is likely time for you to replace your Foulborn Kikazaru with a Rare Ring that has Mana, Intelligence and whatever other Attributes you might need.

Once everything is fixed, you will want to Anoint Split Shot back onto this which will require a Tainted Oil to do given it is Corrupted.

Lastly, you ideally want to use Tainted Catalyst on the Amulet until you get either Elemental or Life & Mana Modifiers.
Tainted Catalyst is completely RNG so I would personally settle for something above 15% or so.
Life & Mana will be stronger than Elemental but they are both very close with Life & Mana also offering more Energy Shield.


Midgame - New Flasks

Granite Flask Trade Link - https://www.pathofexile.com/trade/search/Keepers/Bg35KJQQh8

You do not need your Life Flask anymore so we need to replace it. This will just be swapped out for a Granite Flask with "x% increased Armour during Effect" on it.
This is also a good time to grab some better Flasks and to make sure all of them are 20% Quality if you have not done that yet.


Midgame - New Grafts

Overcharged Sinews Trade Link - https://www.pathofexile.com/trade/search/Keepers/veZn3jkBsE
Wreathed in Light Trade Link - https://www.pathofexile.com/trade/search/Keepers/D6VGReYVC5

It's also about time to look for better Grafts. Previously you were using half decent ones but it is now time to spend some money on much better ones.

First, we are going to keep Overcharged Sinews. You are very tanky and the 10% More Damage taken really won't matter.
You are going to want to look for a double Suffix Graft with any of the mods in the Trade Link above. They are all good and are roughly equal in power so it does not matter which one you get.
The +4 Levels Suffix is useful as there is a breakpoint at Level 34 that makes each Jolt give 3% More Damage rather than just 2%. This is not that much better than the other options but I wanted to add this here for anyone curious as to why.

On top of that, we will now look for one with "x% increased Intelligence" on it as well. While this is a bit weaker than Spell Damage or Mana for now, this will become better in the Endgame so we might as well use the correct one now.

The Heart of Flame Graft is now useless as you do not take Life damage anymore and Call of the Pyre does very little DPS.

Due to this, our second Graft is going to be another Esh base to be able to get a second "x% increased Intelligence" Prefix.
Sadly, both Esh Grafts suck and do basically nothing for us. Wreathed in Light will become useful later but right now the Lucky Damage does nothing given our Minimum and Maximum are the same number due to Clustering.
Once we Int Stack in the Endgame, our Maximum will balloon, making Wreathed useful then.

There is absolutely nothing good on Wreathed that's worth spending extra for other than the Intelligence Prefix so that's our only criteria.
The Trade Link is looking for Level 30 versions which have slightly longer duration on the patches that give you Lucky Damage. If a 4% Intelligence Graft is too expensive, look for lower levels on the Skill, don't get a lower % roll.


Midgame - Foulborn Inspired Learning

Foulborn Inspired Learning Trade Link - https://www.pathofexile.com/trade/search/Keepers/8rleJz3bsV
Rare Ring Trade Link - https://www.pathofexile.com/trade/search/Keepers/bGknM3YdfL

It is time to finally replace your last Foulborn Kikazaru with a proper Rare Ring where you will likely need a lot of Dexterity.
The goal here is to replace the two Rare Jewels you were using with Foulborn Inspired Learnings which will give you a Mini-Headhunter from every Rare you kill. (This makes every strat you do VERY fun)
These will go into the sockets by Mind over Matter and Pain Attunement as the version we are looking for requires no Notables within its Radius and we don't have any near those two Keystones anyways.

The Jewels you previously had likely had enough Dexterity for you to put everything together and you will have to find this on your new Ring.
You can also look for Mana, Intelligence, Elemental Damage with Attacks and whatever other stats you need. If you cannot find one with Intelligence on it, an Open Suffix for the "+x to All Attributes" craft is also good.
The Trade Link will be looking for Rings with all three Attributes on it as the setup in the PoB needed Strength on this ring. Your gear will not be exactly 1:1 with the PoB so find a Ring that fits your exact gear.

You can also choose to only use one Foulborn Inspired Learning while keeping one Rare Jewel if needed. It will make it feel less impressive but if that makes things easier then do that.


Midgame Step 2 - Farming Time


At this point, even Tier 17 Maps should feel somewhat easy and every non Uber-Bossing farming strat should be easy for you to do.
It's time to use that power to make a lot of money as our upgrades are about to get very expensive.

These are going to be some Aspirational items that are going to make your build feel VERY GOOD VERY FAST.


----------------------------------------------------------------------------------------------------------------------------------------------------------------------------------------Step 8--------------------------------------------------------------------------------------------------------------------------------------------------

Midgame - The Great Chaos Swap

Overwhelming Malice Cluster Jewel Trade Link - https://www.pathofexile.com/trade/search/Keepers/LgB4WK2XIn
Second Chaos Cluster Jewel Trade Link - https://www.pathofexile.com/trade/search/Keepers/veZnmWGJuE

Ok, this build wants way too many Unique Jewels and our Passive Tree is a mess. We can't fit them all in, so lets actually go fix that... by swapping from a Lightning build to a Chaos build! Yeah... stick with me here.
Basically, we need Jewel Sockets and the only way to get more is to use Cluster Jewels. The issue with that is that our Cluster Jewels as a Lightning setup suck and there are too many Passive Points we need.
We are going to swap over to Chaos Damage now as that requires less Passive Points while having very strong Cluster Jewels giving us the Jewel Sockets we are so starved for.

This swap over to Chaos Damage will be really simple as all you will need are two new Cluster Jewels, a new pair of Gloves and for you to quickly change the Multi Mod on your Wand.
You can even use your current Gloves and Wand if needed at a small DPS loss but I would not recommend doing that.

The way we will be doing Chaos Damage is through the Cluster Notable Overwhelming Malice that gives you Unholy Might on Crit for 4 seconds.
Unholy Might will convert 100% of Physical to Chaos while also giving you a 25% chance to Wither on Hit. Wither is a debuff that can stack up to 15 times giving you 6% Increased Damage per stack.

While Overwhelming is only a 10% chance, we do so many hits that it becomes trivial to keep up with our near 100% Critical Strike Chance.
It also just so happens that we do ~15 Hits/Second with Kinetic Blast and another 4 with Tornado giving us 38 Hits per 2 Seconds which on average will sustain 8 stacks of Wither. This will also be slightly higher due to Wall of Force.
Later on we will upgrade to Balance of Terror that will give you a permanent 15 stacks of Wither on Bosses.
While clearing it really doesn't matter if the enemies have 15 or not due to how Kinetic Blast works but, given how many Hits they will take, every Rare will hit 15 stacks.

We will need two new Cluster Jewels for this.

One of them needs to have Overwhelming Malice while the other one has no specific requirements as long as it has three Notables that we care about.
Chaos Cluster Jewel crafting is easily the most miserable craft in this game and I will NOT be giving you a Crafting Guide for it.
You will likely want to quit the game after making these so I would rather tell you to just farm money and buy them.

In the Endgame we will craft better ones with Fractures, but that is simply not worth it right now.
The Trade Links above will show you all valid Cluster Jewels. It has all useful Notables in the Filter to show you all options.
If you wish to get the best one possible, you would be looking for Dark Ideation and Unholy Grace on both Clusters along with Unwaveringly Evil or Wicked Pall on the Cluster Jewel with no Overwhelming Malice.
You can also choose to look for Unspeakable Gifts over Unholy Grace if you want more Speedclear, this will be A LOT more expensive and will do nothing on Bosses but, it would feel quite good for everything else.

Once you have both Clusters, you will also need to swap out your Gloves.

The Physical to Lightning conversion on them will go before Overwhelming Malice stopping some of the Chaos Conversion which we don't want.
Given our old Gloves are quite weak, we are going to craft a new pair from scratch that is going to have Mana, Attack Speed and Intelligence like before but now we are going to Multi Mod Energy Shield on them too.


Glove Crafting Guide


First you will need to buy an Item Level 81 or higher pair of Warlock Gloves with Tier 4 or higher Fractured Mana that has more than 20% Quality.
If over 20% Quality Gloves are too expensive, then you should remove the Quality Filter and look for any pair.
The closer to 30% the better but, you should still make sure you get a good Tier of Fractured Mana.

Glove Base Trade Link - https://www.pathofexile.com/trade/search/Keepers/3qjJB8QGH5

1. Use Deafening Essences of Zeal to guarantee Attack Speed until you get Tier 1 Intelligence. This will be a ~1/92 chance.
You can use Shrieking Essences if needed but I highly recommend doing this with Deafening as the Attack Speed roll is quite important.

2. You need to get a pair of Gloves with two Open Prefixes and one Open Suffix.
To accomplish this, you will need to use Orbs of Annulment and Eldritch Orbs of Annulment.

If you got a third Suffix, simply use Orbs of Annulment until you remove it. If you remove the Attack Speed or Intelligence rolls go back to Step 1.
If you have an Open Suffix but need to remove Prefixes, use a Searing Exarch Ember on them then use an Eldritch Orb of Annulment which will only remove Prefixes.

You should now have a pair of Gloves with just Fractured Mana, Essence Attack Speed and Tier 1 Intelligence.

3. Go to the Crafting Bench and craft "Can have up to 3 Crafted Mods" followed by "x% increased Energy Shield." Your final craft will depend on what you want.

If you want to be as tanky as possible, then craft "+x to Maximum Energy Shield" as you final mod.
If you want more DPS, then craft "x% increased Damage during any Flask Effect."

4. Use Lesser Searing Exarch Embers until you get "Gain 1 Rage on Attack Hit." There is no need to use anything more than Lesser Embers for this.
Use Lesser Eater of Worlds Ichors until you get "3% increased Damage per 100 Intelligence." There is no need to use anything more than Lesser Ichors for this.


You will also have go and recolor your Body Armour swapping one Blue over to Green for Awakened Vicious Projectiles as the Awakened Lightning Penetration will do nothing.
You will also need to swap out the Awakened Elemental Damage with Attacks over to Damage on Full Life as the Elemental Damage will do nothing for you.

Sigil of Power can now also be dropped and replaced with Despair. You will simply use this on Bosses for extra DPS.
You can keep Sigil of Power if you wish for the Less Damage Taken, you would just have to remove Second Wind from Wall of Force to have enough space for everything.

You should also go and change the Physical as Cold Boot Eldritch Implicit to Physical as Chaos with Eater of Worlds Ichors. Use Grand for 5% or Lesser for 4%.

Lastly, you need to quickly change your Wand as we do not need the Elemental Penetration anymore and want Chaos Penetration now.
This simply means going to the Crafting Bench, scrolling to the bottom and clicking "Remove Crafted Mods."
This will remove your Multi Mod along with the Elemental Penetration and Hybrid Strength/Int Crit Chance crafts.

Once you have done so, craft "Can have up to 3 Crafted Modifiers" again then craft "Attacks with this Weapon Penetrate x% Chaos Resistance" along with the "+x to Strength and Intelligence, x% increased Critical Strike Chance" Hybrid Mod.

With all of this, you are now ready to swap your Passive Tree over to the Midgame Chaos Swap one which can be found in the Loadouts in the Top-Right of the guide.
Please make sure you have the correct Wand Masteries as they have moved around a bit.

After the swap you can now also level Clarity all the way to Level 20 for a bit more Energy Shield.

You will notice a slight DPS loss to begin with which will very quickly get fixed as we make some major upgrades such as getting Balance of Terror directly after the swap which will let you sit at 15 Wither stacks.

Your clear should feel just about the same.
Elemental Reflect can still kill you due to us having a Physical as Extra Elemental Greatwolf but if you happened to get a different second mod, then you should be doing no Elemental and can ignore both Elemental Reflect.
Physical Reflect will still be a problem as we need to trigger Overwhelming Malice to have our Phyical converted to Chaos.


Midgame - Balance of Terror

Balance of Terror Trade Link - https://www.pathofexile.com/trade/search/Keepers/9zdQzG7ySK

Balance of Terror will be the first of many Unique Jewels you are about to burn a lot of money on.
This Jewel gives you various buffs if you have Self-Casted a Curse recently with us wanting a Despair "Inflict Withered for 2 seconds on Hit if you've cast Despair in the past 10 seconds" variant.

With this you will no longer need to worry about Overwhelming Malice to keep up Wither stacks and will always be at 15 on Bosses.
You can choose to use Despair every 10 seconds while Mapping to keep the buff up but you don't need to if its too much work, Clustering will kill the screen just as fast as before.

Ideally, you would also find one with the second Despair mod "Immune to Curses if you've cast Despair in the past 10 seconds."
This is nice for maps with Enfeeble or Temporal Chains to make those Boss fights a bit comfier. It also somewhat allows you to ignore all Tier 17 Curse Map Mods although using Despair every 10 seconds for that sounds... despair.
The second mod will be very expensive and I do not recommend spending money on until much later in the build as a pretty insignificant upgrade.


----------------------------------------------------------------------------------------------------------------------------------------------------------------------------------------Step 9--------------------------------------------------------------------------------------------------------------------------------------------------

Midgame - Awakened Fork

Awakened Fork Trade Link - https://www.pathofexile.com/trade/search/Keepers/Bg32J273f8

First up is Awakened Fork which simply put... will crash your GPU. Awakened Fork is the upgraded version of Fork that makes your Forks... Fork.
This will get very silly very fast and will be a direct upgrade to the Runegraft we were using previously.

Once you get this you will need to recolor your Body Armour back to a Green socket from the Red socket you had for Damage on Full Life.

Not only will Awakened Fork be an insane Speedclear improvement but, it will also give you Single Target DPS.
This is due to the third Fork from Split Shot now being able to Fork when it hits the Boss giving you another Returning Projectile hit on the Boss 50% of the time.
This build on average hits the boss 3.75 times per attack which is why the Count is set to 3. (Its actually been a lie this whole time and your DPS is a bit higher than advertised)

With Awakened Fork, this brings up the average to 4.
While this won't be that big of a DPS upgrade over Damage on Full Life, it will be a slight increase while being a massive Clear increase which saves you one Passive Point from not needing the Runegraft anymore.

Until you get Impossible Escape, pick up Thrill Killer and Written in Blood.
These points are meant to be used with Impossible Escape to pick up Split Shot and the two other Passive Points within the radius of Acrobatics.


Midgame - Forbidden Jewels

Forbidden Flesh Trade Link - https://www.pathofexile.com/trade/search/Keepers/LgBJGw87cn
Forbidden Flame Trade Link - https://www.pathofexile.com/trade/search/Keepers/veZdBMOJuE

Now that the Passive Tree is fixed, lets become tankier. First up, we are going to grab our Forbidden Flesh & Flame combo for the build, Radiant Faith.
This is a set of two Jewels which when both equipped, will give you a free Ascendancy Node from your Class if they are matching.
This Node can be from any of your three Ascendancies and we are looking to pick up Guardian's Radiant Faith.

This node is going to do some very silly things which will only get stronger and stronger as we get to the Endgame.
Simply put, Radiant Faith gives you free Energy Shield and Armour for just having your Mana Reserved.
Kinetic Blast of Clustering only cares about your Total Mana Pool and does not care if its reserved or not. We are still stacking Mana to push this scaling further and are now grabbing as much Intelligence as possible giving you even more Mana.
This means we have quite a lot of potential out of Radiant Faith already and once we start Int Stacking in the Endgame, this will become very strong very fast.

Radiant Faith is our gateway to 20-30k+ Energy Shield and a lot of free Armour.

Once you have both pieces, you can simply just replace two of the Rare Jewels with them and thats it. You should see your Energy Shield spike as soon as you equip both to know that its working.

The final thing I need to note here is its price. These Jewels will rollercoaster a lot in price but you should not panic purchase it and you should constantly check on its price.
I found that around ~10PM - 3/4 AM EST or ~3AM - 8AM Europe Time is when these are at their cheapest and it might be worth staying up late or waking up early to grab a cheaper pair.
Keep in mind me putting this here will now likely make them more expensive during this time. The point is, don't rush to buying this and take your time.


Midgame - Impossible Escape

Impossible Escape Trade Link - https://www.pathofexile.com/trade/search/Keepers/Yp9Qqy7OIY

It's also time to fit in another amazing Jewel, Impossible Escape. This Jewel will allow you to pick up Passive Points around a Keystone and in our case we want one for Acrobatics.
This will allow you to pick up Split Shot giving you your Amulet Anoint back.

At the same time, there is also a Small Passive Point near Split Shot giving another 25% chance to Fork which is... very good and this hits Multishot giving you better clear and slightly more DPS.

With Impossible Escape, you now want to swap your Anoint on your Eyes of the Greatwolf over to Tranquility which is a hidden Anoint. (You can find this at the top of the Passive Tree below the Witch Ascendancies in PoB.)
Tranquility is going to become our highest DPS Anoint as it turns the +1% Energy Shield you get per 5 Intelligence into a free +0.3% Damage per 5 Intelligence which is going to very quickly become a lot of DPS.

As soon as you get this, you can just replace one Rare Jewel with it.
Please keep in mind you cannot slot Impossible Escape into a Cluster Jewel or it will not work, you need to put it into a Jewel Socket on your Passive Tree.


----------------------------------------------------------------------------------------------------------------------------------------------------------------------------------------Step 10--------------------------------------------------------------------------------------------------------------------------------------------------

Midgame - Mageblood

Mageblood Trade Link - https://www.pathofexile.com/trade/search/Keepers/aLkrgq6RSe

Its time. We are free. We no longer will have to be plagued by Dexterity.
You are now going to buy a Mageblood because... it has Strength and Dexterity on it.

In all seriousness, Mageblood is going to be a major upgrade for the build. This will greatly help us with our Attributes while also allowing you to drop Purity of Elements for Haste or Determination.
It is also going to serve as a major backbone of the Endgame setup and attempting to put it together without this is basically impossible.

Please do not buy a Corrupted 2-3 Flask Mageblood. Only purchase a Un-Corrupted Mageblood that you then Divine to 4 Flasks if it is not already. Anything less will be a brick and it will be useless.

First, we need to talk about Flasks as a Mageblood is nothing without them.
Given that Mageblood will permanently turn them on, we can now use Enkindling Orbs which normally has the downside of not letting you gain Charges while your Flasks are active.
This will then allow you to roll for "70% increased Effect" which when combined with the 25% increased Effect Prefix will nearly double the power of every Flask.

Your Mageblood was very expensive, perfect Flasks cost a fraction of the price. Please do not settle for anything except perfection as your Mageblood is a paperweight without them.


Mageblood Flasks

Trade Link - https://www.pathofexile.com/trade/search/Keepers/RJwPa6GZc7

We are now going to want to run a Quicksilver, Bismuth, Jade & Diamond Flask.
You can also choose to replace the Diamond Flask with a Quartz Flask for any high density content where having Phasing is more important.

On all of your Flasks you will want the "25% increased Effect, x% reduced Duration" Prefix.
You do not care about the roll on the Duration as your Flasks are now permanent.

As for Suffixes, you are going to look for:

52+ % Chance to Avoid being Stunned during Effect
52+ % chance to Avoid being Shocked during Effect
20% additional Elemental Resistances during Effect
60% increased Evasion Rating during Effect

The Avoid Stun and Avoid Shock rolls just need to be 52% or higher as the 95% increased Effect from the Prefix and Enkindling Orb will make them be over 100%.
The Elemental Resistance and Evasion Rating rolls should only be gotten as their maxrolled versions.

The Trade Link above will have all of this setup in one filter. You should search for the individual Flask bases and do a bit of window shopping to see what is cheap.
A Quicksilver with Resistances might be 2 Divine while a Jade with Resistances might be 30c.
Once you have bought a Flask with one of the Suffixes, you should turn it off in the Filter so you don't see Flasks with it anymore.

This will now greatly Overcap you on Resistances while making you Immune to All Stuns, with more Evasion Rating, Movement Speed and Crit Chance.
You can now swap out your Energy Shield Mastery from the Stun one over to the Less Physical Damage Taken one.


Stormshroud

Stormshroud Trade Link - https://www.pathofexile.com/trade/search/Keepers/EBoLdKOyt5

With the Avoid Shock Suffix on one of your Flasks you now have a 100% chance to Avoid Shocks, and with the Bismuth Flask & Elemental Resistance Suffix, you have a lot of total Resistances.
The Avoid Shock can then be used with Stormshroud to turn it into a 100% chance to Avoid All Elemental Ailments.

With this, Purity of Elements is now useless and we can replace it with anything else.
I would recommend picking either Haste or Determination if you want more DPS or to be Tankier.
Keep in mind Determination won't do that much and I probably recommend going for Haste.


New Watcher's Eye

Watcher's Eye Trade Link - https://www.pathofexile.com/trade/search/Keepers/d8ZgpK2PiJ

It is now also worth it to go look for a new Watcher's Eye with a second useful mod on it.
Up until now we just used one with the Clarity mod but there are some useful mods on Haste and Determination.

My personal recommendation is to look for the Haste "You have Phasing while affected by Haste" mod which removes the need to ever consider a Phasing Flask.
"You gain Onslaught for 4 seconds on Kill while affected by Haste" is also a reasonable mod allowing you to swap the Movement Speed craft on your Boots to the "Increased Movement Speed if you have not been Hit recently" version.

As for Determination, "You take x% reduced Extra Damage from Critical Strikes while affected by Determination" is a massive EHP increase as realistically only Crits are dangerous to you.
"x% additional Physical Damage Reduction while affected by Determination" is also a good option.

All of these will be in the Trade Link but you will have to turn off the Haste mods and turn on the Determination ones if you are not getting Haste.


Midgame - Heist Ring

Kalandra's Touch Trade Link - https://www.pathofexile.com/trade/search/Keepers/4mM32L6vU9

It's time for our second major craft of the build after the Wand we made at the start of the Midgame!
You will now be looking to make a new Ring on a Helical Base which is a Heist Ring. These Rings are special as they can only have 1 Prefix but can have 4 Suffixes with all of them being 50% higher rolls.
Now that you have Mageblood putting these on is reasonable and not a complete pain.

This will give you a lot more Intelligence than you had before getting you ready for the Endgame where we will Int Stack.
Given how expensive crafting just one of these is, we will use a Kalandra's Touch in our other Ring Slot to make a copy of the Ring we will craft saving us from having to make two of them.


Heist Ring Crafting Guide


This craft will be expensive and a bit luck based as you will need to make your own Fractured base.
Once you succeed on the Fracture, the rest of the craft is very cheap.

First, buy an Item Level 85 or higher NON-FRACTURED Helical Ring.

If you find one that is not Split for the same price as the Split ones, you can use a Fenumal Plagued Arachnid to Split it into two copies.
(You will likely not find this unless someone misprices it as it should be worth 2x more than a normal Split Helical Ring)

Helical Ring Base Trade Link - https://www.pathofexile.com/trade/search/Keepers/KlYjdbmRU5

1. Use Deafening Essences of Scorn to guarantee Global Critical Strike Multiplier until you hit Tier 1 Intelligence. This is a ~1/63 chance.
Do not use Shrieking Essences and do not settle for anything but Tier 1 Intelligence.

2. You need to have EXACTLY 4 mods on your Ring. If you happen to roll a total of 5 you must use an Orb of Annulment to remove one.
If it removes the Global Critical Strike Multiplier or Intelligence, go back to Step 1.

If it only has 3 mods, use an Exalted Orb to get a random modifier.

3. Use a Fracturing Orb and hope you win the 50/50 chance that either the Global Critical Strike Multiplier or Intelligence gets Fractured.
If you do win, you can move on to Step 4, if you lose, you must buy a new base and try again. If the Fracture happens to hit something valuable, you might be able to re-sell it.

4. With a Fractured Global Critical Strike Multiplier or Intelligence Ring, use either Deafening Essences of Scorn or Spite to guarantee either Global Critical Strike Multiplier or Intelligence until you hit Tier 1 Mana. This is a ~1/34 with Scorn and a ~1/57 with Spite.
You should use the Essence of the modifier that you did not Fracture.

5. You need at least one Open Suffix on the Ring, if you do not have one use an Orb of Annulment on the Ring. If it removes the Mana or the Non-Fractured Essence mod then go back to Step 4.

6. With an Open Suffix, craft the "+x to All Attributes" mod. Make sure to keep crafting it until it is maxrolled.

7. Use 20 Intrinsic Catalyst on the Ring to give it 20% Quality.


You can now directly replace one of your Rings with this and you can put a Kalandra's Touch in the other Ring slot to get a second copy of the Ring you just made!


Midgame to Endgame Transition

At this point, Tier 17 Maps should be a joke with the only thing giving you any trouble being the Bosses with bad mods.
Uber Bosses should now be pretty easy as you have more than enough DPS but, you will not be able to facetank every single ability... yet.

The Endgame is going to start off with a very explosive and expensive beginning which is going to very quickly spike the build.
At this point your build should be worth ~1 Mirror and we are going to very quickly push to 2+ Mirrors in no time so, find a strong farming strategy and get to making some money.
The upgrades will still be granular like before so it's not like you need that money upfront but, it will all be very expensive items.

The point of the Endgame in this build isn't for Tier 17 Maps or "Casual" strategies, the Endgame for this build will be to get it ready for Valdo Maps and 6k Depth in Delve... the true Endgame of PoE.
Our build is basically raw paper when it comes to that content and it will simply chew you and spit you out, unless we do something about it.

With that said, the Midgame is now over and it is time for the Endgame.


==============================================================================================================================================================================================================================================================
----------------------------------------------------------------------------------------------------------------------------------------------------------------------------------------------------------------------------------------------------------------------------------------------------------------------------------------------------------------------------------------------------------------------
----------------------------------------------------------------------------------------------------------------------------------------------------------------------------------------------------------------------------------------------------------------------------------------------------------------------------------------------------------------------------------------------------------------------

----------------------------------------------------------------------------------------------------------------------------------------------------------------------------------------Endgame------------------------------------------------------------------------------------------------------------------------------------------------------------------------------------------------------------------

----------------------------------------------------------------------------------------------------------------------------------------------------------------------------------------------------------------------------------------------------------------------------------------------------------------------------------------------------------------------------------------------------------------------
----------------------------------------------------------------------------------------------------------------------------------------------------------------------------------------------------------------------------------------------------------------------------------------------------------------------------------------------------------------------------------------------------------------------
==============================================================================================================================================================================================================================================================


The Endgame of this build will come in three parts.

First we will finally become a proper Int Stacker going from the ~1000 Intelligence you had to almost 2000.
Then, we will make you nearly unkillable with Sublime Vision and damage conversion.
Lastly, we are going to skyrocket the DPS of the build.

The goal of the Endgame is to get you ready for Valdo Maps and 6k Depth in Delve which requires a lot out of your build.

While you could do Voided Valdo Maps with this build, I do not recommend trying unless you have a Fully-Mirrored build.
You are also likely better swapping over to a Trickster due to Energy Shield Overleech being broken.

This setup is going to be designed for 4 Tormented Spirit Non-Voided Feared Valdos where I expect you to die at most 1 time per Feared with low personal skill.
With the Mirror Tier setup you should never die to any Feared in any Valdo Map.


Endgame - Getting Level 100

First off, you need to get to Level 100 relatively soon. While this is not "required," it will make everything a lot easier if you have all Passive Points to work with.
This is more of a passive progression point but, you should easily be able to do this without much difficulty. You don't have to do it right away but please consider Level 100 at some point.

You are also likely very poor now and aiming for Level 100 is a good goal as youll start making some money for the upcoming upgrades.

You have a few options on how to get to Level 100:

5-Ways

First, you can just buy 5-Way carries all the way up to Level 100. This will cost ~30-40 Divine and will take several hours but it will be 100% Safe and AFK.


Simulacrums

Another more enjoyable option is to do Simulacrums all the way to Level 100. This will take ~30-40 Sims from ~Level 98 or so and should basically be 100% AFK.
The only thing that could possibly kill you in there is a Late-Wave Kosis with bad mods so as long as you pay attention at the end that shouldn't be a problem.

If you want to do Sims, you really should have Phasing in your build either through a Quartz Flask or the Haste Watcher's Eye mod. If not you might just randomly die from not being able to move.

I also recommend having Corrupting Blood Immunity as that is a potential way to lose XP from Kosis as his Auto Attacks will apply it.
Sadly, the only real option for this is to get a Stormshroud that has Corrupting Blood Immunity on it which is... very expensive.
You do not need this but if you want to straight up AFK while holding down Kinetic Blast and looking at a second monitor, you likely want to grab this.

You will make ~5-7 Divine an hour doing Sims assuming you are efficient and do 4 every hour. It should take ~10 hours to hit Level 100 from ~98 like this but you will make money at the same time.


Deli Mirror Farming

Guide - https://youtu.be/KtT-CslevIY

Your third option is just doing Delirium Mirror with Shrines and Beyond. This simply is just a strategy where you are filling up your Map with a lot of monsters and are just rushing through it.
This should be quite safe but it will be slower than Simulacrums or 5-Ways. This will also be a move active playstyle as you cannot AFK like you could in Sims or 5-Ways.

I have a farming guide on this linked above which is focused on profits but, the XP setup would be the exact same.
Sadly, this will be less profit than Simulacrums but you could always get lucky and end up making more.


Stacked Deck Farming

Guide - https://youtu.be/jVZ3OIJdsFM

As your final option, you have a much slower but significantly more profitable farm with Stacked Decks.
This simply involves using 5 Cloister Scarabs and farming high Pack Size Maps. This will give much less XP than 5-Ways or Sims but this can be very profitable.

You can expect ~12 Divine an hour in profits with this strategy and you gain enough experience to go from 98 to 99 in about 60 Maps.
99 to 100 would likely take 200-300 Maps but it would also make you ~250 Divine while doing so across a few days.


Endgame - Corrupting Blood Immunity

Stormshroud Trade Link - https://www.pathofexile.com/trade/search/Keepers/5n8m0n2Vta
Light of Meaning Trade Link - https://www.pathofexile.com/trade/search/Keepers/2KdpXB9YIk

This is a step you can skip if you want to but, it is worth putting this here if you want to become Immune to it.

Corrupting Blood is a very annoying debuff and sadly getting Immunity to it at this point in the build will be very expensive.
You need to get a Jewel with it as a Corrupted Implicit and given at this point we are using nothing but Unique Jewels, this is going to be very costly.

While you do not need Immunity to this, you can literally just ignore it in Maps as you just outsustain it, if you want to farm Feared you will need it for Sirus.

Given that, your only real options are Stormshroud or a Energy Shield Light of Meaning which will be added into the build in the next step.
You should check both Trade Links and buy whatever is cheaper.


Endgame - Level 21 Gems


At this point it is worth considering getting Level 21 Skill Gems with 20% Quality as they should be quite cheap compared to what you have put into the build so far.
21/20 Kinetic Blast of Clustering will be a ~10% DPS increase on its own and should be somewhat cheap given how much it gives at once.

Returning Projectiles and Sacred Wisps also offer 1% DPS increases. Increased Critical Damage is quite awful and should only be upgraded if you have the money for it.
Level 6 Awakened Fork and Awakened Vicious Projectiles also offer 1% DPS increases but they will be extremely expensive and not worthwhile to upgrade until much much later into the build.

Lastly, Sniper's Mark and Mark on Hit offer ~2-3% DPS increases at 21/20 and should be somewhat cheap.

You can also choose to upgrade your other Skills and Supports for minor gains if you want to but nothing else will give you much of an upgrade.


----------------------------------------------------------------------------------------------------------------------------------------------------------------------------------------Step 11--------------------------------------------------------------------------------------------------------------------------------------------------

Endgame - New Helmet

At this point, Mindspiral is starting to fall off in terms of power and given we are playing Chaos Inoculation, we are missing a large chunk of Physical Damage Reduction.
Due to this, its time to craft a new Rare Helmet that will give you ~300-400 more Energy Shield than even a maxrolled Mindspiral along with ~3% more DPS.
We will also finally have access to Eldritch Implicits so we gain ~9% more Physical Damage Reduction which is a very difficult stat to gain.

This Helmet should cost ~10-15 Divine to craft in total.
Note - You will need a Level 4 Enlighten to make use of the Helmet once crafted.


Helmet Crafting Guide


Buy an Item Level 84 or higher Lich's Circlet that is 21% Quality or higher with a Fractured Tier 1 x% increased Energy Shield mod.
You can also go for a higher Quality if you wish or, if it is too expensive, you can get something cheaper. You can also get a lower roll on the Fractured mod if needed.

Helmet Base Trade Link - https://www.pathofexile.com/trade/search/Keepers/Z6q9B2eEfQ

1. Use Deafening Essences of Woe to guarantee +x to Maximum Energy Shield until you get Tier 1 Mana. This should be a ~1/69 chance.
At this point in the build, anything but perfection is pointless given how much money has gone into it so only use Deafening and only go for Tier 1.

2. You will need 3 Open Suffixes, use a Eater of Worlds Ichor on the Helmet then use Eldritch Orbs of Annulment to remove all Suffixes.

3. Go to the Crafting Bench and craft "Can have up to 3 Crafted Modifiers" followed by "+x to Intelligence" and "% increased Rarity of Items Dropped by Slain Rare or Unique Enemies."
The Rarity mod is the only other useful Suffix we have access to and it will increase your Gold gain. You can choose to skip this and to craft a Resistance instead if needed or to not bother with the multimod.

4. Use Grand Eater of Worlds Ichors on the Helmet until you get "7% of Physical Damage from Hits taken as Chaos Damage." You should not use lower tier Ichors as this mod is the whole reason we crafted this Helmet.
Use Grand Searing Exarch Embers on the Helmet until you get either "% increased Despair Curse Effect" or "While a Unique Enemy is in your Presence, x% increased Despair Curse Effect."
The Unique version of the Despair mod is better as you never use Despair on anything but Bosses anyways. The normal one is fine too as the Unique one is quite rare.

Enlighten Trade Link - https://www.pathofexile.com/trade/search/Keepers/eRGyE9QWIL

You will now need to buy a Level 4 Enlighten which will be linked to Precision, Grace & Haste. Second Wind will also need to be removed from Wall of Force to make space for Clarity.


Endgame - New Greatwolf Talisman

Greatwolf Trade Link - https://www.pathofexile.com/trade/search/Keepers/yYpbM87eCR

It's time to finally get a better second mod on your Greatwolf Talisman. Previously we looked for one with x% increased Maximum Mana and one of a handful of useful secondacy mods.
We will now want to look for a new one with the x% increased Maximum Mana mod along with x% increased Attributes.

This will be your BiS Amulet for the rest of your time playing this build and even a mid-rolled one will beat a perfect double % and Damage per Intelligence Simplex.
The only way to beat this would be with a Reflected Simplex which would cost.. Mirrors.

A two-mod Greatwolf like this will be expensive and the very well rolled ones are going to cost a lot of money.
It is up to you which of the two mods you want to prioritize. A higher Attribute roll will give you more Energy Shield while a higher Mana roll will give you slightly more DPS.
I personally recommend to focus on the Attribute roll as at this point DPS starts to become a bit pointless.

Once you buy one, Anoint Tranquility on it again just like before and then use Tainted Catalyst to get either 20% Life and Mana modifiers or 20% Attribute modifiers.
Again the choice is up to you, Mana is more DPS while Attribute is higher tankiness.


Endgame - Int Stacking Cluster Jewels

Endgame - New Jewels & Body Armour Implicits

Endgame - Atziri's Reflection

----------------------------------------------------------------------------------------------------------------------------------------------------------------------------------------Step 12--------------------------------------------------------------------------------------------------------------------------------------------------

Endgame - Sublime Vision Swap


.