4 months ago
 Level 100 Smite Slayer3.27
Life: 3,794108%
Mana: -48
eHP:
77,061
Resistances: 74%/76%/75%/75%
Evade: 68%
Armour: 36,577
Evasion: 18,015
DPS: 4,757,925
Speed: 5.08
Hit Chance: 100%
Config: 10% Shock, Frenzy, Power
Bandit: Kill All
Pantheon: Soul of the Brine King, Soul of Garukhan
Gear


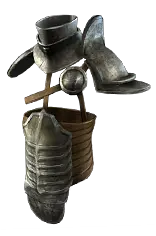
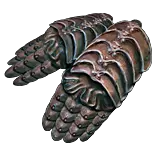










Gems
Vaal Smite
Increased Critical Damage
Volatility
Multistrike
Elemental Damage with Attacks
Added Lightning Damage
Enlighten
Arctic Armour
Wrath
Precision
Flesh and Stone
Determination
Leap Slam
Faster Attacks
Brutality
Enduring Cry
Assassin's Mark
Mark On Hit
Lifetap
Frostblink
Automation
More Duration
Tree Preview
 Precise Technique
 Accuracy Mastery
- +500 to Accuracy Rating
- -2 to Accuracy Rating per Level
 Attack Mastery
- Non-Vaal Strike Skills target 1 additional nearby Enemy
 Axe Mastery
- Gain 2 Rage on Hit with Axes
 Charge Mastery
- 100% increased Charge Duration
 Elemental Mastery
- Hits have 15% chance to treat Enemy Monster Elemental Resistance values as inverted
 Evasion Mastery
- +15% chance to Suppress Spell Damage if Equipped Helmet, Body Armour, Gloves, and Boots all have Evasion Rating
 Leech Mastery
- 5% of Leech is Instant
 Life Mastery
- 15% increased maximum Life if there are no Life Modifiers on Equipped Body Armour
 Mana Mastery
- 12% increased Mana Reservation Efficiency of Skills
 Spell Suppression Mastery
- Chance to Suppress Spell Damage is Lucky
Notes
Levelling

All of these tips assume a fresh start, or at least not using a dedicated reroll build (like Hollow Palm.) If you have another levelling setup you feel more comfortable with you can definitely do that. PConc could also be good on a fresh start
but as I'm not familiar with that I don't want to share questionable information about it. The important thing is that you have fun while efficiently clearing the campaign.

Before starting your Duelist you'll need to mule Smite from a Templar. Kill Hillock, grab everything, get smite from Tarkleigh, dump into your stash, and then start your Duelist. Make sure to level Smite in your offhand setup.

Act 1:
Spectral Throw (Buy after Hillock) - Added Fire Damage - Faster Attacks (Both are rewards from the same quest, so take one and buy the other from Nessa. Run Chance to Bleed and Momentum before this.)
Frostblink (Buy after Mudflats, you'll be able to put it on at level 5 if you take the Dex travel nodes to the Int node there.)
Leap Slam - Faster Attacks/Momentum (Faster Attacks is better but Momentum is an early quest reward if you don't have the currency for another Faster Attacks)
Decoy Totem (Quest Reward)

You can run Shield Charge in your weapon swap early, before you have Leap Slam. You should do this as long as you don't hate weapon swapping, it adds a lot of speed in the middle of this act.

There are a number of little gear pieces that will be huge early on. Amber Amulet/Heavy Belt are both great as we need Strength for our weapons and gems but don't get a lot from the tree. A Rustic Sash can be great early. Ideally we want a 2 handed axe
but any good weapon is fine for now as we won't have any weapon specific points for a little while still. RRG is our best early 3 link but RRR or RGG can both work as well. Try to have at least 1 Sapphire Ring by Merveil. You can swap to Smite as soon as
you have the "Non Vaal Strike Skills target 1 additional nearby enemy" Mastery, but I usually wait to do this until I get to the A2 town.

Act 2:
Smite - Elemental Damage with Attacks - Faster Attacks (Ele Damage is a quest reward from Sharp and Cruel, which opens several other decent supports as well.
Herald of Ice (Quest Reward)
Poacher's Mark (Same quest as HoI so you'll have to buy this one from Yeena)

Also make sure you pick up Trinity for levelling in your offhand setup, along with  Flesh and Stone and Blood Rage.

Help Alira early (you can also choose to Kill All Bandits if you don't want to respec but it's hard for 1 point to beat 15 Elemental Resistance this early)

Act 3:
Haste / Anger (Anger can activate Trinity, Haste is a lot of QoL, both are good and can be bought from Clarissa after completing Lost in Love)

For early 4 links your best colors are RRBG if you can proc Trinity and RRRG if you can't. If you're not sure about this there are a bunch of great resources from other creators, but the general rule is that your second highest damage type needs to
have a max that is higher than the minimum of the highest type. For example, if you do 100-1000 Lightning damage and 50-300 Cold damage then your Trinity would work fairly reliably, but if you did 400-1500 Lightning and 50-300 Cold then your second
damage type could never be higher than your highest, and you would never proc Trinity.)

For the tree... only take the Hatchet Master cluster of nodes if you're actually using an Axe. You should be, but sometimes you'll find a good Sword or something and use that instead. If this is the case then just keep travelling up to Primeval Force
and come back for the Axe nodes later. This act is also where you'll probably do a bit of gambling to get 4 links and potentially a new weapon. Gambling is nerfed this league, but I assume it will still be useful to shore up weak spots during the campaign.

Act 4:
Smite - Elemental Damage with Attacks - Multistrike - Trinity / Added Cold Damage / Added Fire Damage (Trinity is best but you have to make sure you're proccing)
Mark on Hit - Poacher's Mark - Lifetap (Mark on Hit can be purchased from the twin vendors and Lifetap back in Act 1.)

If you have extra sockets you can also grab a Stone Golem or Fire Golem from the quest reward at the end of the act. It's not a lot of power but it does something with an empty socket at this early stage of the game.

Act 6 and beyond:
You probably want to add in a Steelskin setup at some point, but this is pretty low priority. At this point you should start levelling any gems you see in the mapping setups that you don't already have. If you don't have space in your main links you can
always use your weapon swap. You can buy all of these gems by completing The Twilight Strand Quest from Lilly at the start of the Act.


Ascendancy Order
Lab 1 - Impact
Lab 2 - Brutal Fervour
Lab 3 - Bane of Legends
Lab 4 - Headsman

You could also take Brutal Fervour last. Your damage will feel much better but you lose the only defense we get from our Ascendancy so there is a real opportunity cost to this.


Early Maps
This guide is tailored to trade, but you could absolutely play this build in SSF. You're just going to spend longer getting some of these uniques.

I'll have an early maps gear set with barebones stuff to get you started. Once you're strong enough to break into Tier 16s your immediate priority should be getting Rakiata's Dance. For the price this sword is absolutely unmatched, and can easily carry you
through Uber bosses and juiced T17 mod content. If you're on a second character and have the money you can just pick this up right away and shift your focus over to every other piece of gear.

Prior to Rakiata's Dance you're better off using a Rare Axe. Hatchet Master is so strong early and the Rage generation from the Mastery is incredible until you can easily gain Rage from other sources.

Because of our position on the tree it's trivial to cap Spell Suppression. You can get a low roll on a single piece of gear, Eldritch Implicit on Gloves, or even a craft (body armour is the best spot for this.)

Make sure you check your build in PoB before you switch away from Precise Technique. My build wasn't stronger without it until after I had gotten my first 2 stones, but this was on a fresh start so your experience may vary greatly. The important thing here is
to test out your changes here in PoB before you commit to swapping into Crit.

Getting a Lethal Pride asap is huge, essentially solving our Strength by itself. Try to get some combination of Endurance Charge on Kill, Intimidate on Hit, and Gain Rage on Hit (prioritizing in that order.) If you just have the first 2 nodes that's still an excellent
starter jewel, and you can always go back later to get one with more useful nodes. You can also look for jewels to go into the other viable socket we have, so you have quite a few options here. You can use the "Find Timeless Jewel" function at the bottom of the
Tree tab here, and I've already plugged in the 3 nodes we care about. You can change the jewel socket to search up at the top, and if you want to drop one of the nodes from being mandatory simply replace the last 1 in that line with a 0.

The Taming is amazing for damage and ele res at the cost of losing life in that slot. I do recommend using it but if you're feeling squishy and want to level you could drop it for a rare ring with a good life roll and whatever other stats you need to fill out your character.

Yoke of Suffering is very similar to Rakiata's Dance. You CAN beat it with a rare but it's incredibly hard to do and would be MUCH more expensive. Because of this you should just pick up Yoke whenever you can afford it and ignore that slot until you're very deep
into the endgame.

Getting a good Conquest Lamellar is massive for your survivability. If you already have Rakiata's Dance and 6 linking your new body armour would be expensive you can just run a single 6 link in your weapon and put off the second 6 link til you build up your stash again.
If you want to craft this my suggestion is to pick up a decent Fracture on a base and use some Dense Fossils to get your prefixes right. If you hit well then you can finish with Prefixes Cannot Be Changed -> Harvest Reforge Chaos (Chaos Res) or
Phys (PDR but ONLY if your Prefixes are already full.)

Clusters are great but I would wait to put them in until you have good enough gear that you can trim some of the fat off the tree. Getting high res on your gear allows you to save a bunch of points, getting more Suppression on gear saves points, you have options here.
I think it's most important for your first Cluster to have Fuel the Fight and Graceful Execution as the notables out front. This allows you to trim some points from your Leech nodes while still keeping Mana Leech and pick up some sorely needed Attributes as well.

For Smite links... check whether Increased Critical Strikes or Increased Critical Damage is better for you. If Trinity won't proc then you can run both of these or Added Lightning Damage


21 Vaal Smite vs 3.28 extra support gems
This is a really tough call for us. Losing out on the level isn't so bad but when paired with the loss of Vaal Smite this feels like a real opportunity cost. You'll certainly get better single target from an extra support, but then losing Vaal Smite is a real hit to the clear.
I think this call will be made based on the content that you're farming, and if you stick to this build you might even keep both options around and swap to match your farms.

If you do want to go the imbued gem route some winners from a quick browse in here are Inspiration, Hypothermia, Endurance Charge on Melee Stun, Fortify, and Trinity. Trinity is harder to make work and is less damage than a levelled version but it loses much less
from being level 1 than any of our other supports which makes it viable in this slot.

Exceptional Support Gems
Since we don't know a lot about these I'm not including anything about them yet. I'll be looking around and testing as the league progresses so keep an eye out for update videos!

Lategame Optimization

Eventually we drop Impact from our Ascendancy and pick up Masterful Form. At 7 Frenzy Charges (all 3 from the tree and the 1 from the Ascendancy) this is less damage than Impact but not by a lot, and in exchange we get 3 more Endurance Charges and save a
point.

The single best large upgrade overall is a Foulborn Unnatural Instinct. If you want to push this build well beyond just the start this is going to be where you want to save up for that first big purchase. You don't need both mods, the main thing here is the mod
"Grants all bonuses of Unallocated Notable Passive Skills in Radius." Changing the other line just gives us +20 Intelligence which is absolutely helpful but not at all necessary as we can make that up other places.

Progenesis is hands down the single biggest upgrade to our survivability. It's very expensive but it's worth it, and even if you were to add Mageblood I think you would continue to use Progen for mapping as it's just that good. You could carry a Tincture with you
and swap for bosses if you don't mind that and feel like you need the extra DPS in those fights.

Getting the Socketed Gems are Supported by Level 10 Fortify implicit on Rakiata's Dance is really nice and if you can get one for a reasonable price it's solid. Not only is it a nice damage boost but you free up your Eater of Worlds implicit on your body armour,
and the fortify feels much more reliable. I got mine for 10d with decent damage rolls and linked/colored/qualitied myself. Long term I'd love to double corrupt a nice one with Fortify and any other relevant implicit (Attack Speed is best here.) One thing to keep in mind
when going for corrupted implicits is that you're losing a significant amount of Accuracy. Make sure you solve this before switching or it'll feel bad.

You could drop Blood Rage since we already have good Frenzy Charge generation and use a Level 1 Vitality to open up those mods on a Watcher's Eye.

If you are adding Mageblood then you CAN switch your Auras around a bit. For this setup drop Haste and Wrath, pick up Purity of Lightning and Determination, and run Runegraft of Treachery.
Fit in Melding of the Flesh and run with a Topaz Flask for a huge boost to your max res. This is an alternative that can make hitting Max Res cap easier but I generally found just a bit less strong overall. Still, it's worth trying out and isn't strictly worse in all respects.

Map Regexes
I've deleted this entire section because I'm not entirely sure what map mods will even exist this league. That said, the most painful regular mods are still around so avoid No Leech and Ele Reflect, and also avoid Max Res maps if you're feeling squishy.


Hopefully this helps some of you have a good time!